
Access
Connect cross-platform accounts & identity management
Get a 360 view on game health by combining crash reporting, performance analytics, build quality and binary distributtion into one toolbox
AccelByte Cloud’s Matchmaking service allows parties to be paired so that they can compete against each other in your game. With AccelByte Cloud’s Matchmaking services, you can create your own matchmaking rating (MMR) by configuring match attributes to determine how parties are matched up under ideal conditions. You can also create flex rules, which dictate how to match parties when ideal matches aren’t possible. These flex rules usually include time limits for the matchmaking process, to ensure that players don’t have to wait too long to play your game.
Like our Cloud Party services, Cloud Matchmaking uses WebSocket to ensure real-time updates for players. Here’s the basic flow of our matchmaking service:
Players need to be in a party to use matchmaking. The Cloud Matchmaking service supports parties with single users or multiple users, and also supports matching parties with an odd number of users, e.g. a party with one user vs. a party with three users. You can configure all of the matchmaking rules in our Admin Portal.
Follow the steps below to set up the Matchmaking channel in the Admin Portal:
In the Admin Portal, choose a Game Namespace
Open the Game Management section.
Click Lobby and Matchmaking.
Select Matchmaking Ruleset.
On the Matchmaking page, click Add Configuration to create a new matchmaking channel.
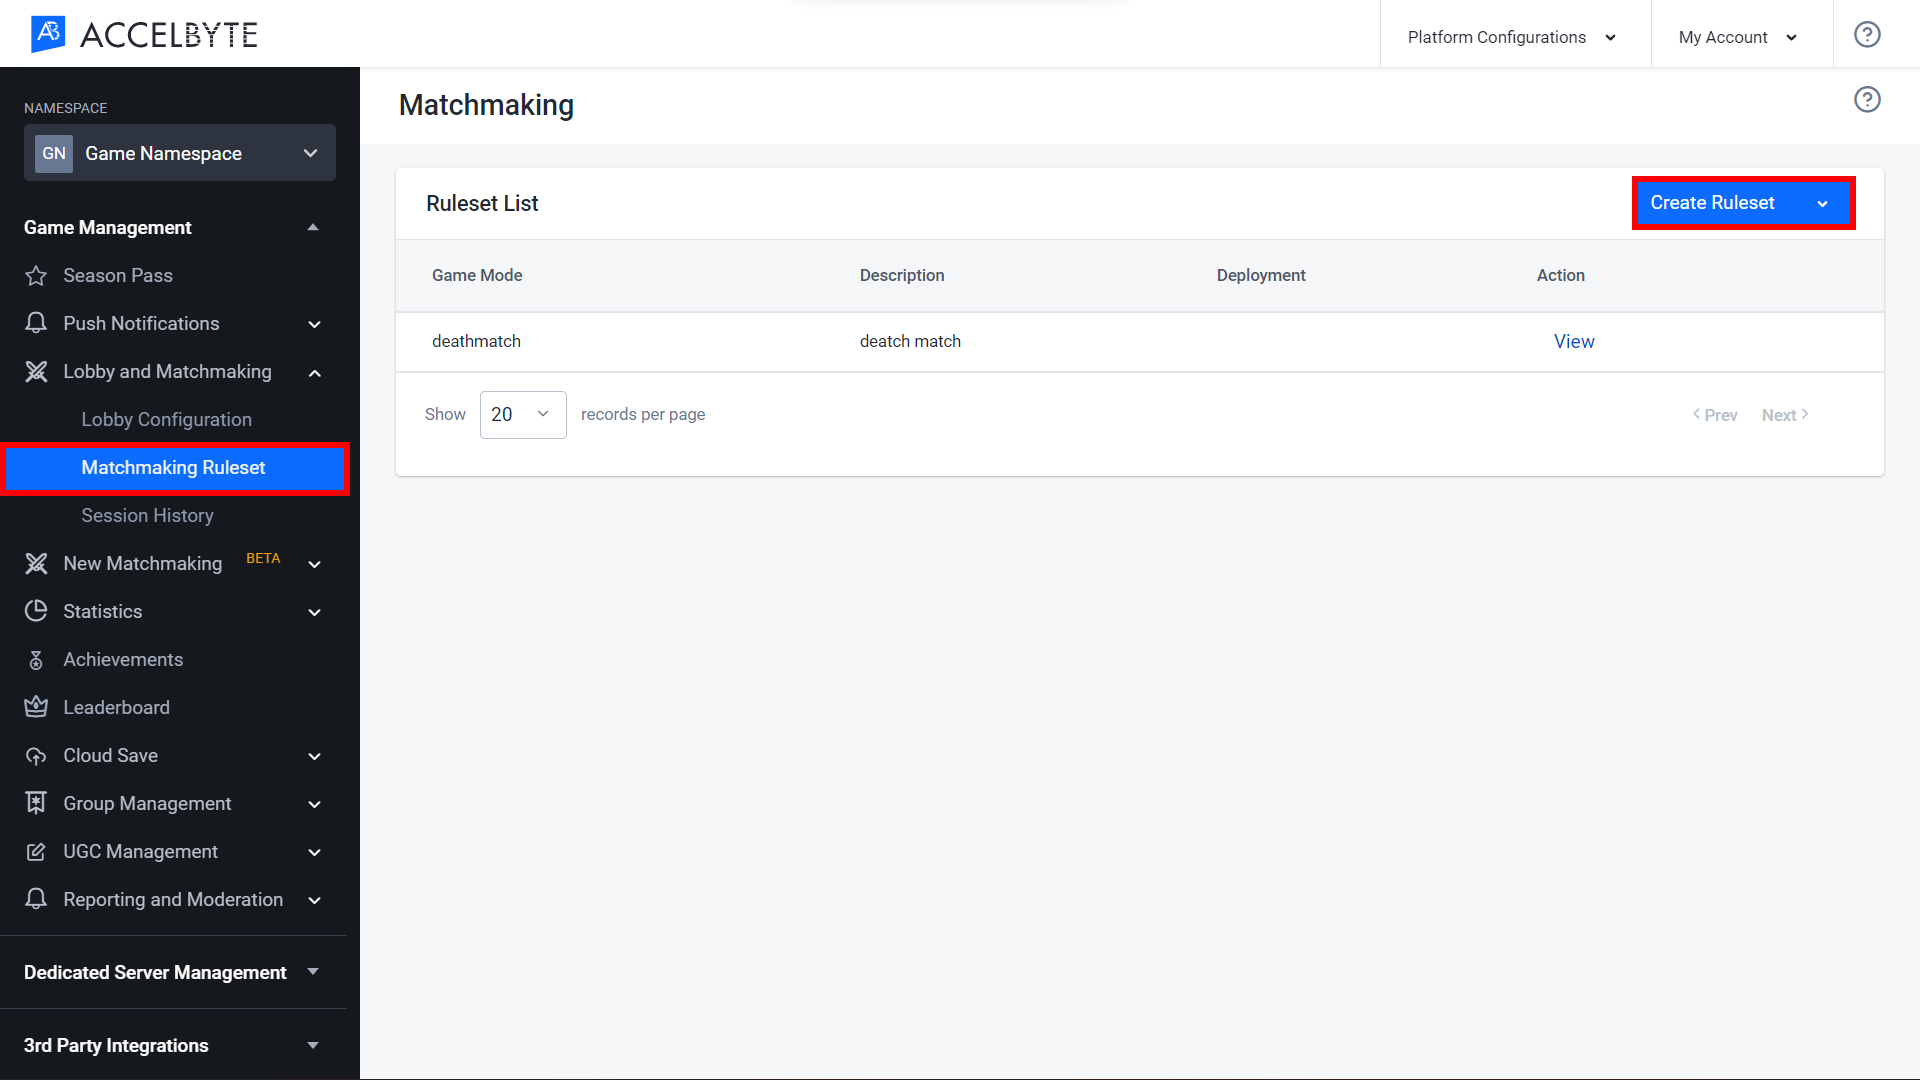
The Create Ruleset page will appear.
Fill the required information.
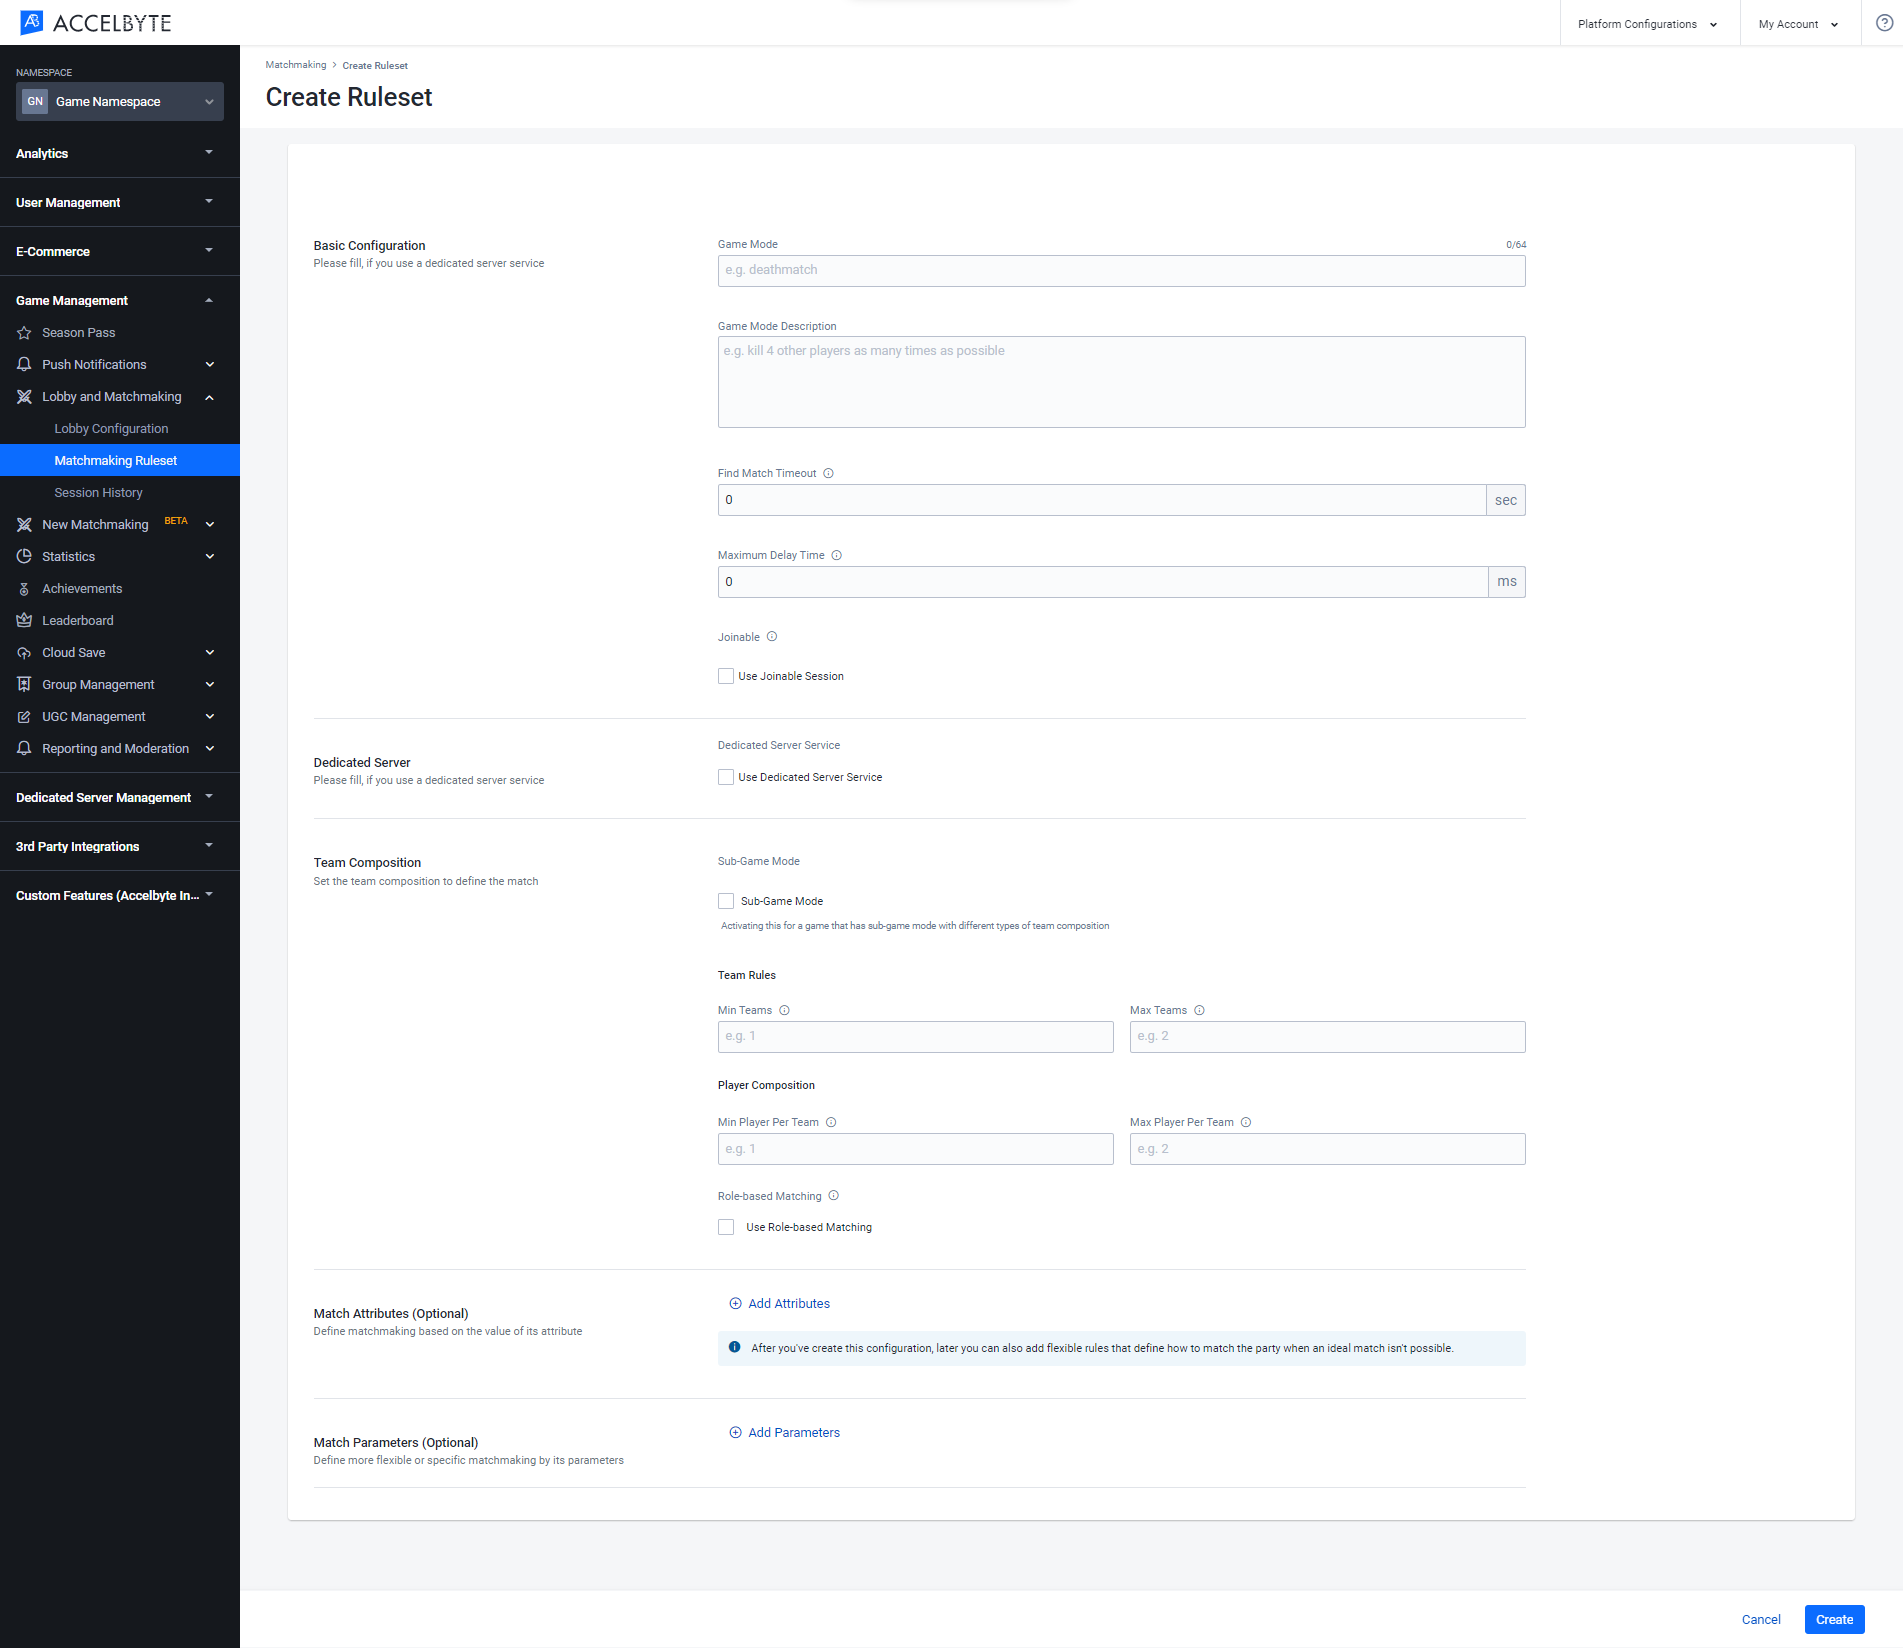
Input a name for the game mode in the Game Mode field.
Input a description of the game mode in the Game Mode Description field.
In the Find Match Timeout (sec) field, input the amount of time (in seconds) the game client should spend finding a match before timing out.
In the Maximum Delay Time (ms) field, input the amount of time (in milliseconds) the game server will wait to assign a Match ID to a newly initiated match.
TIP
The Maximum Delay Time can be used to help match players together in situations where the player count is low, such as during testing.
If you want your matchmaking to be joinable, select the Use Joinable Session checkbox and, in the Joinable Session Timeout (sec) field, input how long, in seconds, a match should be joinable before timing out.
IMPORTANT
Before you can implement Joinable Sessions, you must grant the following permission to your game server’s IAM Client (opens new window):
| Usage | Resource | Action |
|---|---|---|
| Joinable Session | NAMESPACE:{namespace}:SESSION | Create, Read, Update, Delete |
Use this configuration if you want to use Armada (opens new window):
Select the Dedicated Server Service option.
Choose Dedicated Server Deployment.
NOTE
If you leave the deployment empty, Armada will spawn the default deployment.
To enable a Sub-Game Mode, click the Sub-Game Mode checkbox. Please refer to the Game Mode section to decide which game mode that suits your need including the detail of each field.
To enable Role-Based Matchmaking, click the Role-Based Matchmaking checkbox. Please refer to the Role-Based Matchmaking section to decide whether this configuration suits your need or not including the detail of each field.
NOTE
If you activate the Sub-Game Mode configuration, you'll need to configure Role-Based Matchmaking for each sub-game mode.
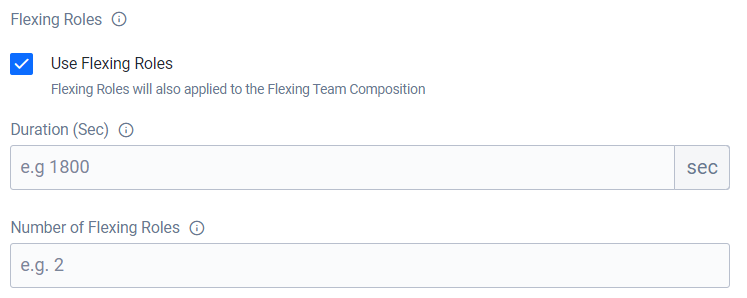
Select Use Flexing Roles if you want to further refine how matchmaking searches for players.
To add Match Attribute, click Add Attribute. Please refer to the Add Matching Rules section to decide whether you need to configure this section or not. If you don’t configure this section, then the matchmake will be processed without considering the attribute.
To add Match Parameters, click Add Parameters. Please refer to the Add Match Parameters section to decide whether you need to configure this section or not. If you don’t configure this section, then the matchmake will be processed without considering the parameter.
Each game has its own game mode. Either be it has a single game mode, or has multiple game mode. For each mode, you need to configure Team Rules and Player Composition.
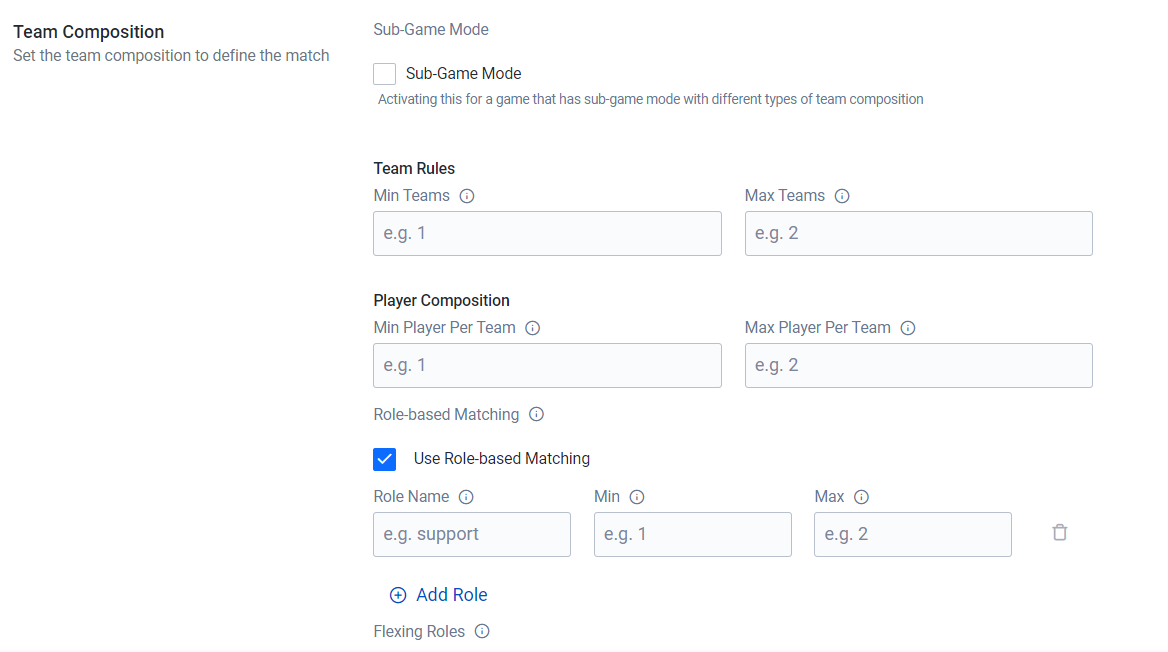
Team Rules define the minimum and maximum team number for each game mode. Can be defined using the Min Teams and Max Teams field.
Player Composition define the minimum and maximum player number for each team. Can be defined using the Min Player Per Team and Max Player Per Team field.
If your game has multiple game mode, you can activate Sub-Game Mode. By activating this mode, you’ll need to create sub-game modes and each sub-game mode will have its own team rules and player compositions. Other than that, each sub-game mode has its own role-based matchmaking.
You can configure role-based matchmaking for each game mode if you want to define the composition of each team member’s role in a team. If you decided to use Role-Based Matchmaking configuration, you’ll need to choose the Party Type to define player number for each role and teams. There are two available party type; Symmetric and Asymmetric.
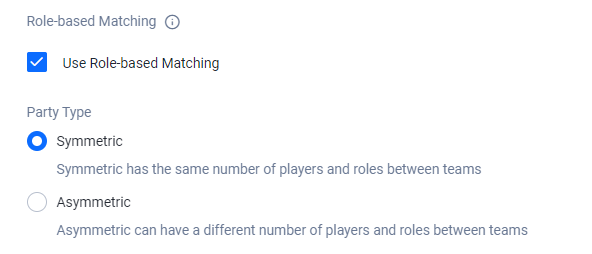
After choosing the party type, you’ll need to define:
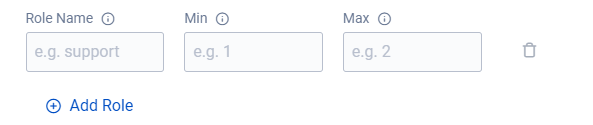
Choose the Symmetric party type if you want each teams have the same number of players and roles. If you choose this type, you’ll need to create roles and define three parameters above for each role. All team in the same party will have the same role and player number composition. The role number is unlimited, with minimum one role. To add more role click Add Role.
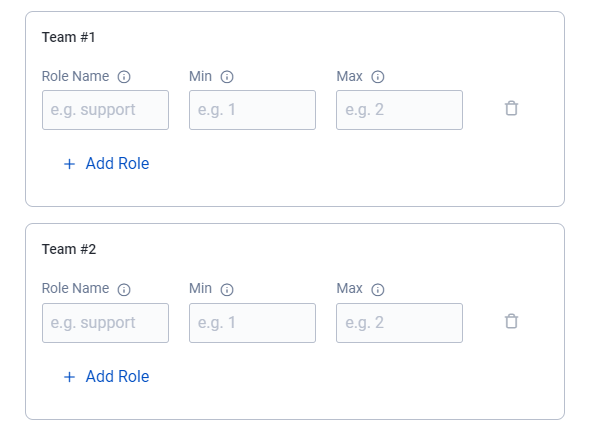
Choose the Asymmetric party type if you want each teams can have a different number of players and roles between teams. If you choose this type, you’ll need to create roles and define three parameters above for each teams. The team number that you need to create is the number you entered to the Max Teams field.
After creating a new matchmaking channel, you can add a Flexing Match Team rule to prevent matchmaking from timing out when not enough players are available based on the Main Team Composition.
In flexing match teams, you can define the rules and player numbers that apply after a set duration of time, as follows:
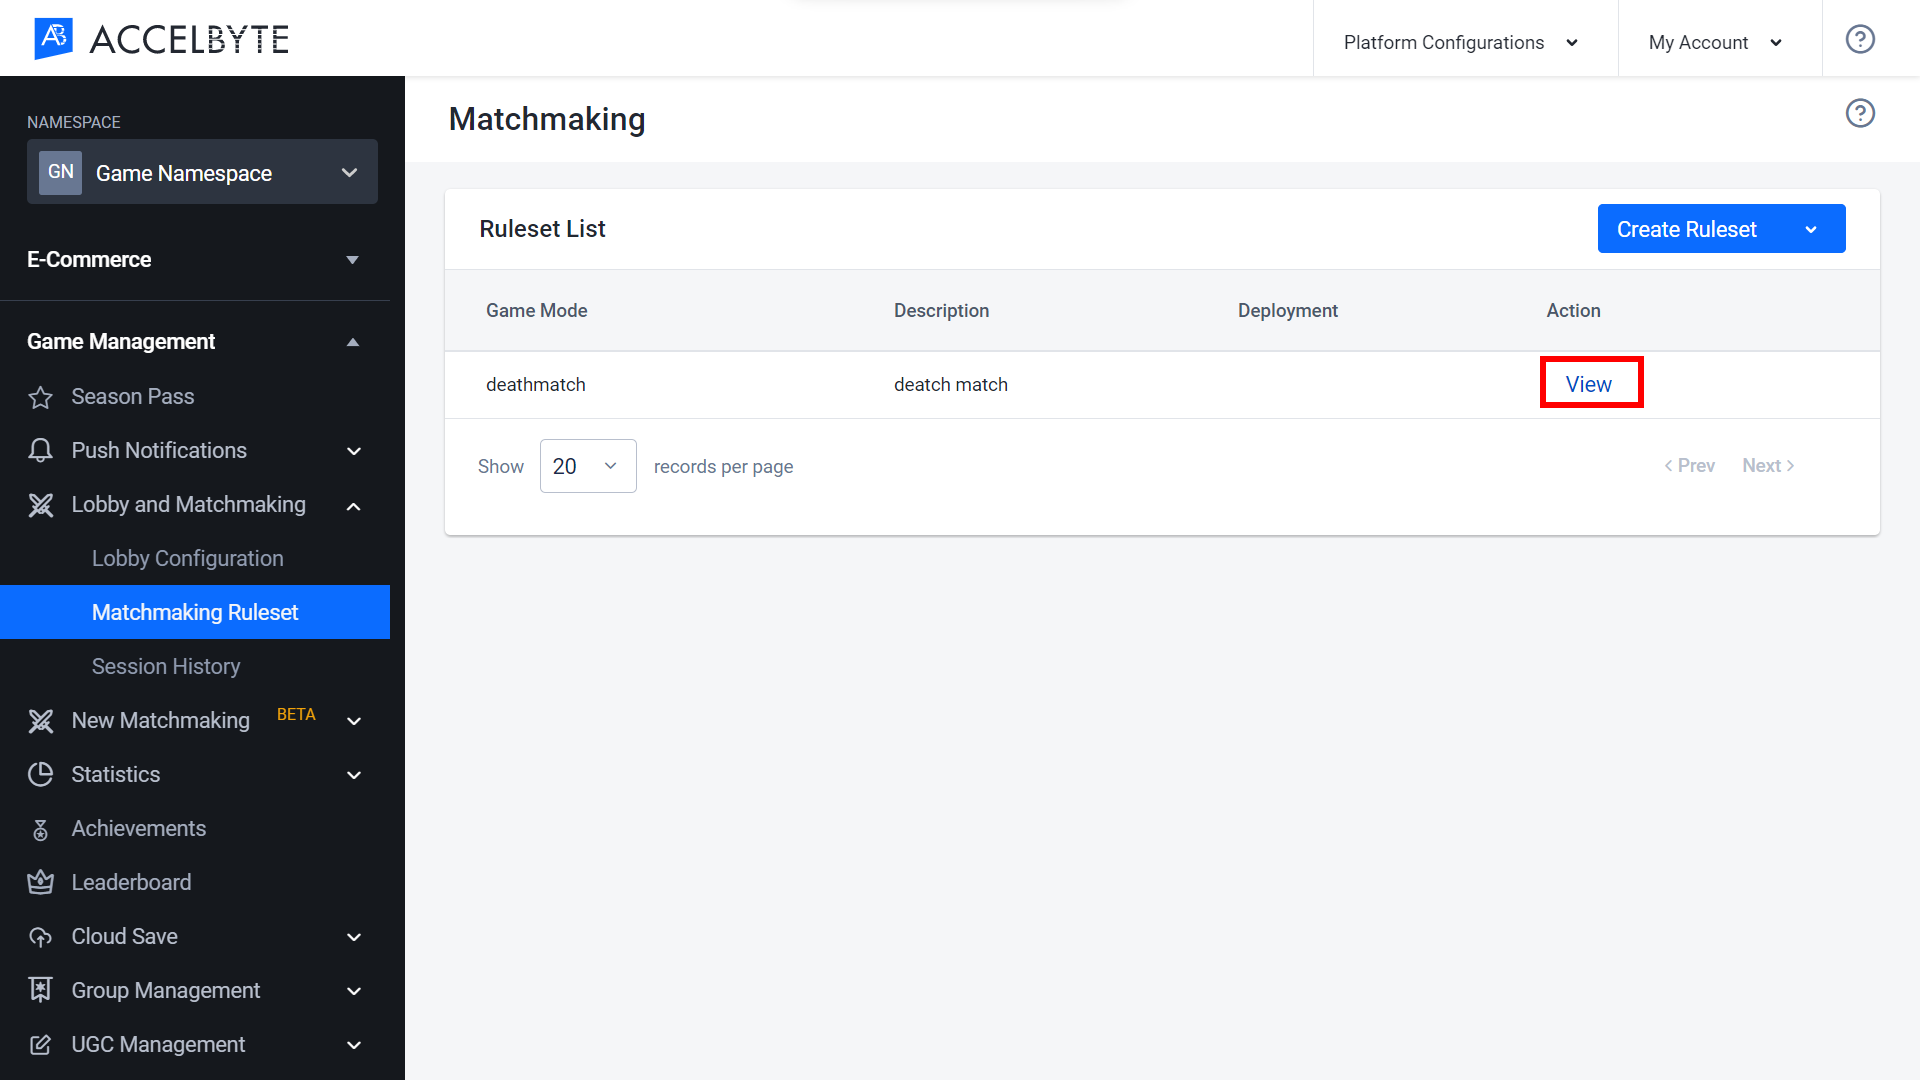
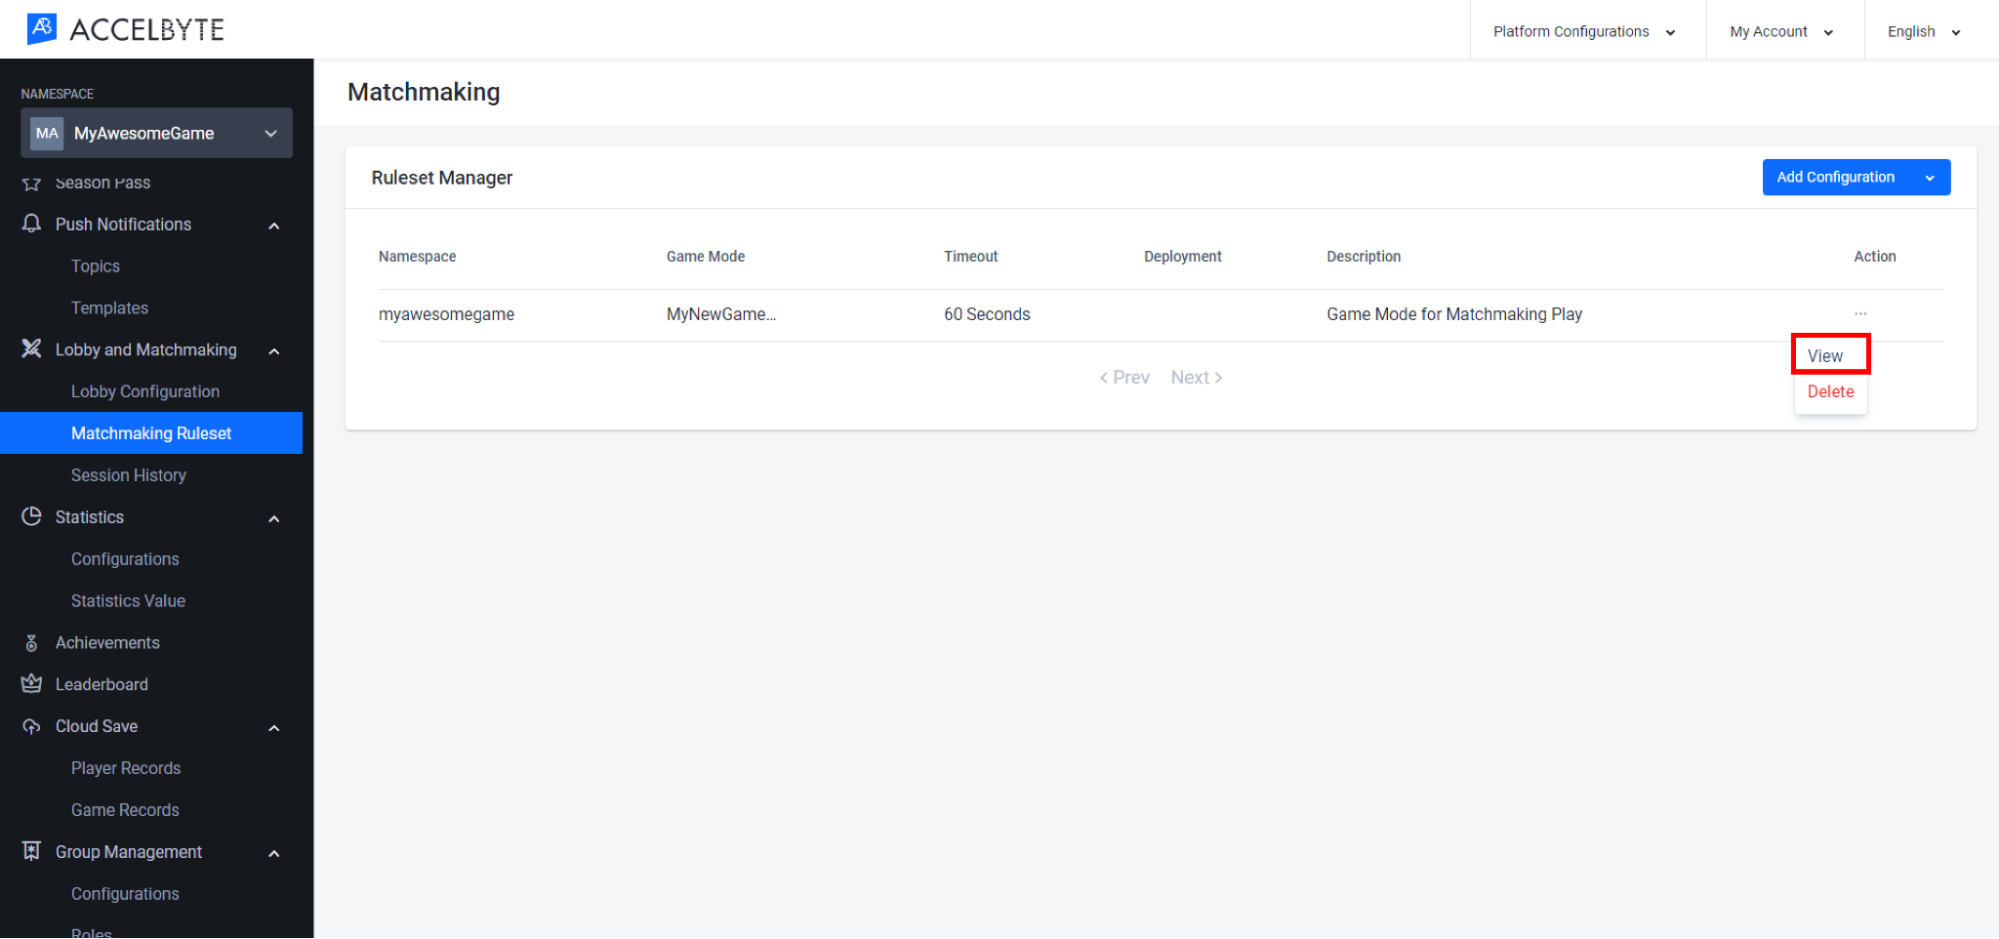
In the Admin Portal, go to the Matchmaking Ruleset page.
Choose the Game Mode you wish to manage.
In the Action column, select View.
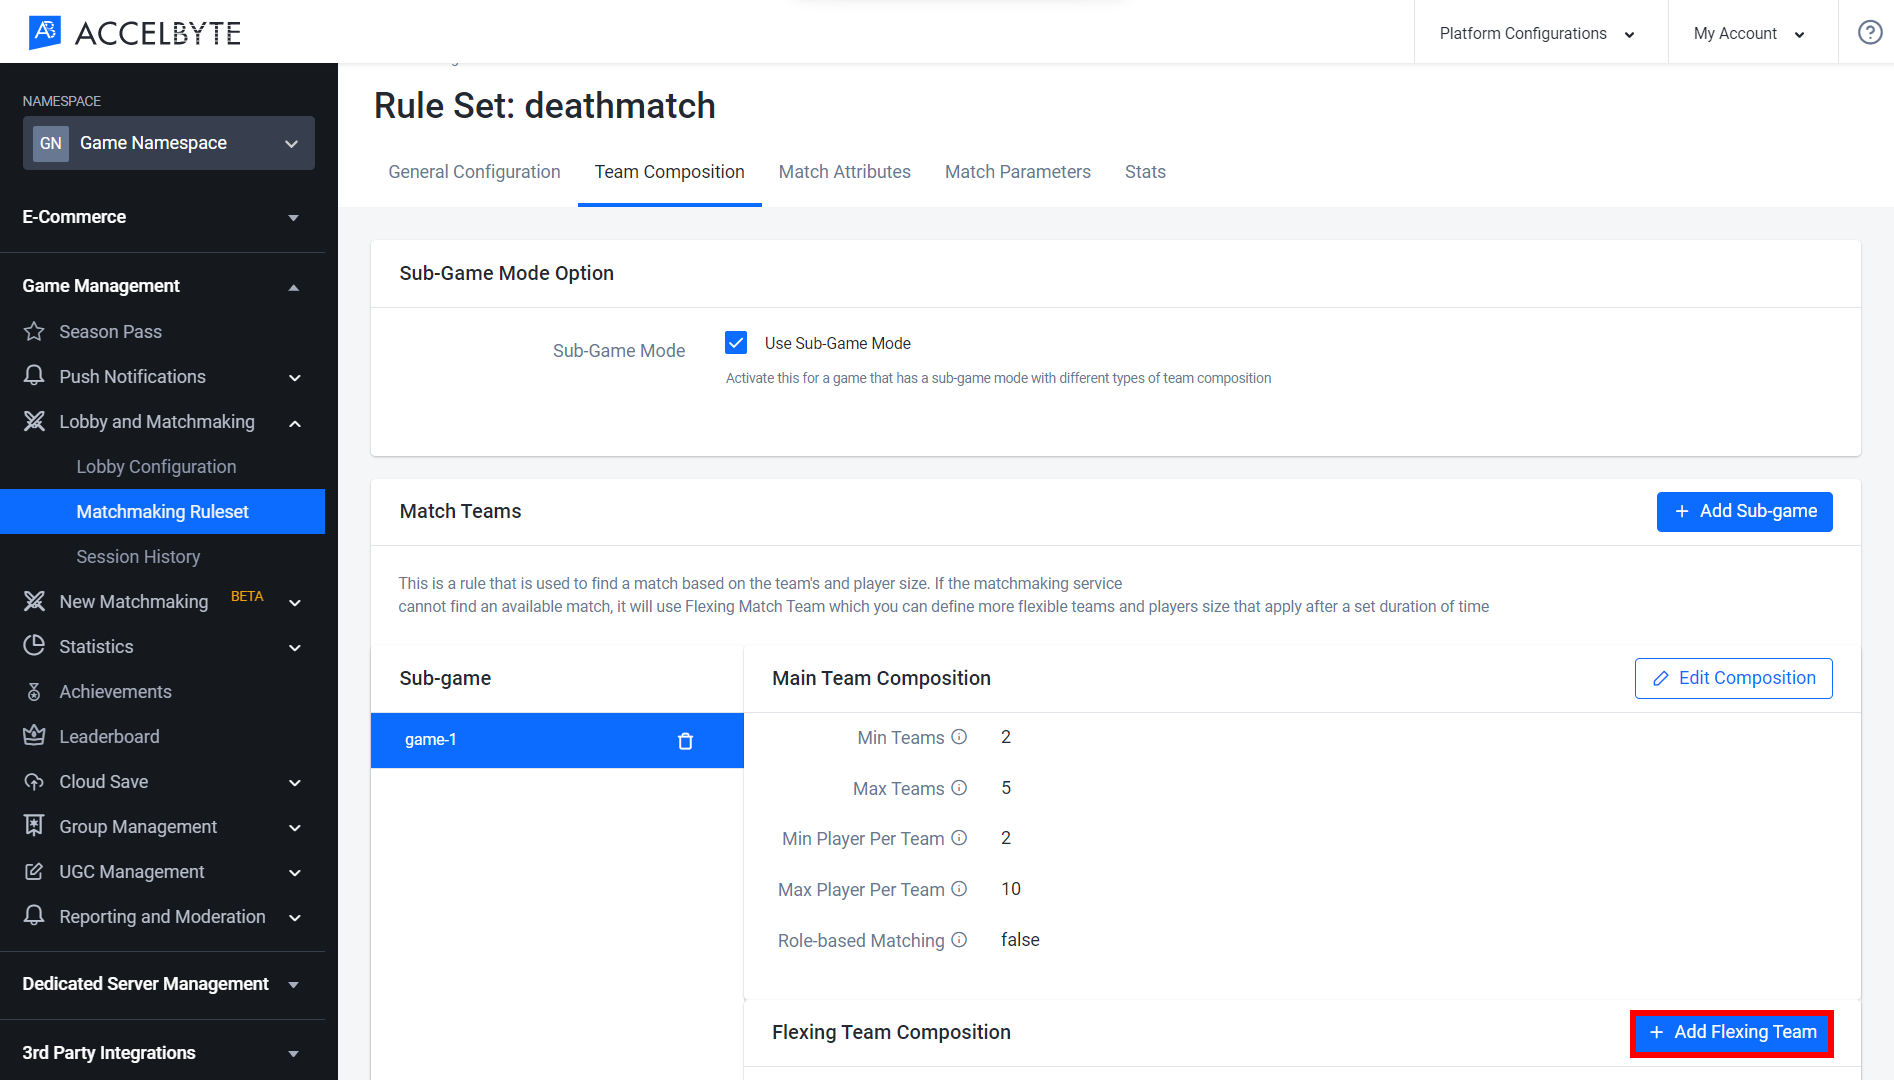
Go to the Team Composition tab at the top of the Rule Set page.
Scroll down to the Match Teams section.
Click the Add Flexing Team button.
The Add Flexing Team Composition form will appear. Fill in the required fields:
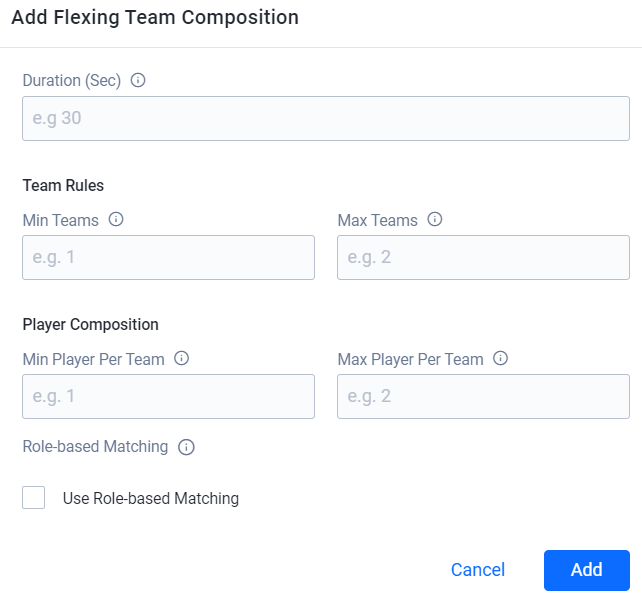
Duration (Sec): Input the duration (in seconds) for the Flexing Team Rule to take effect when no match can be found using the predefined matching rules.
Min Teams: Input the minimum number of teams required for a match.
Max Teams: Input the maximum number of teams allowed in a match.
Min Players: Input the minimum number of players required to form a party.
Max Players: Input the maximum number of players allowed in a party
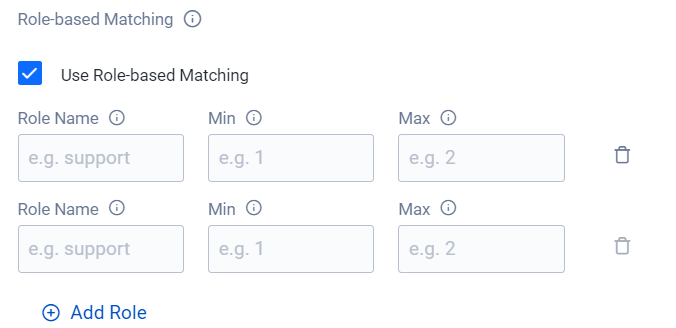
Select Use Role-based Matching if you want to define the composition of players’ roles on each team in a party.
When you’re finished, click the Add button and the Flexing Match Team will be added to the list.
You can use match attributes to create a matchmaking rating for each player. The main Match Attributes will be used to find an available match, and the Flexing Attributes will be used when the matchmaking service cannot find an available match based on the main match attributes.
Use the steps below to add match attributes:
In the Admin Portal, go to the Matchmaking Ruleset page.
Choose the Game Mode to which you want to add matchmaking rules.
In the Action column, click the More Options (...) button
Select View.
The Matchmaking Detail page displays.
Open the Match Attributes tab.
Go to the Match Attributes section.
Click the Add Attribute button.
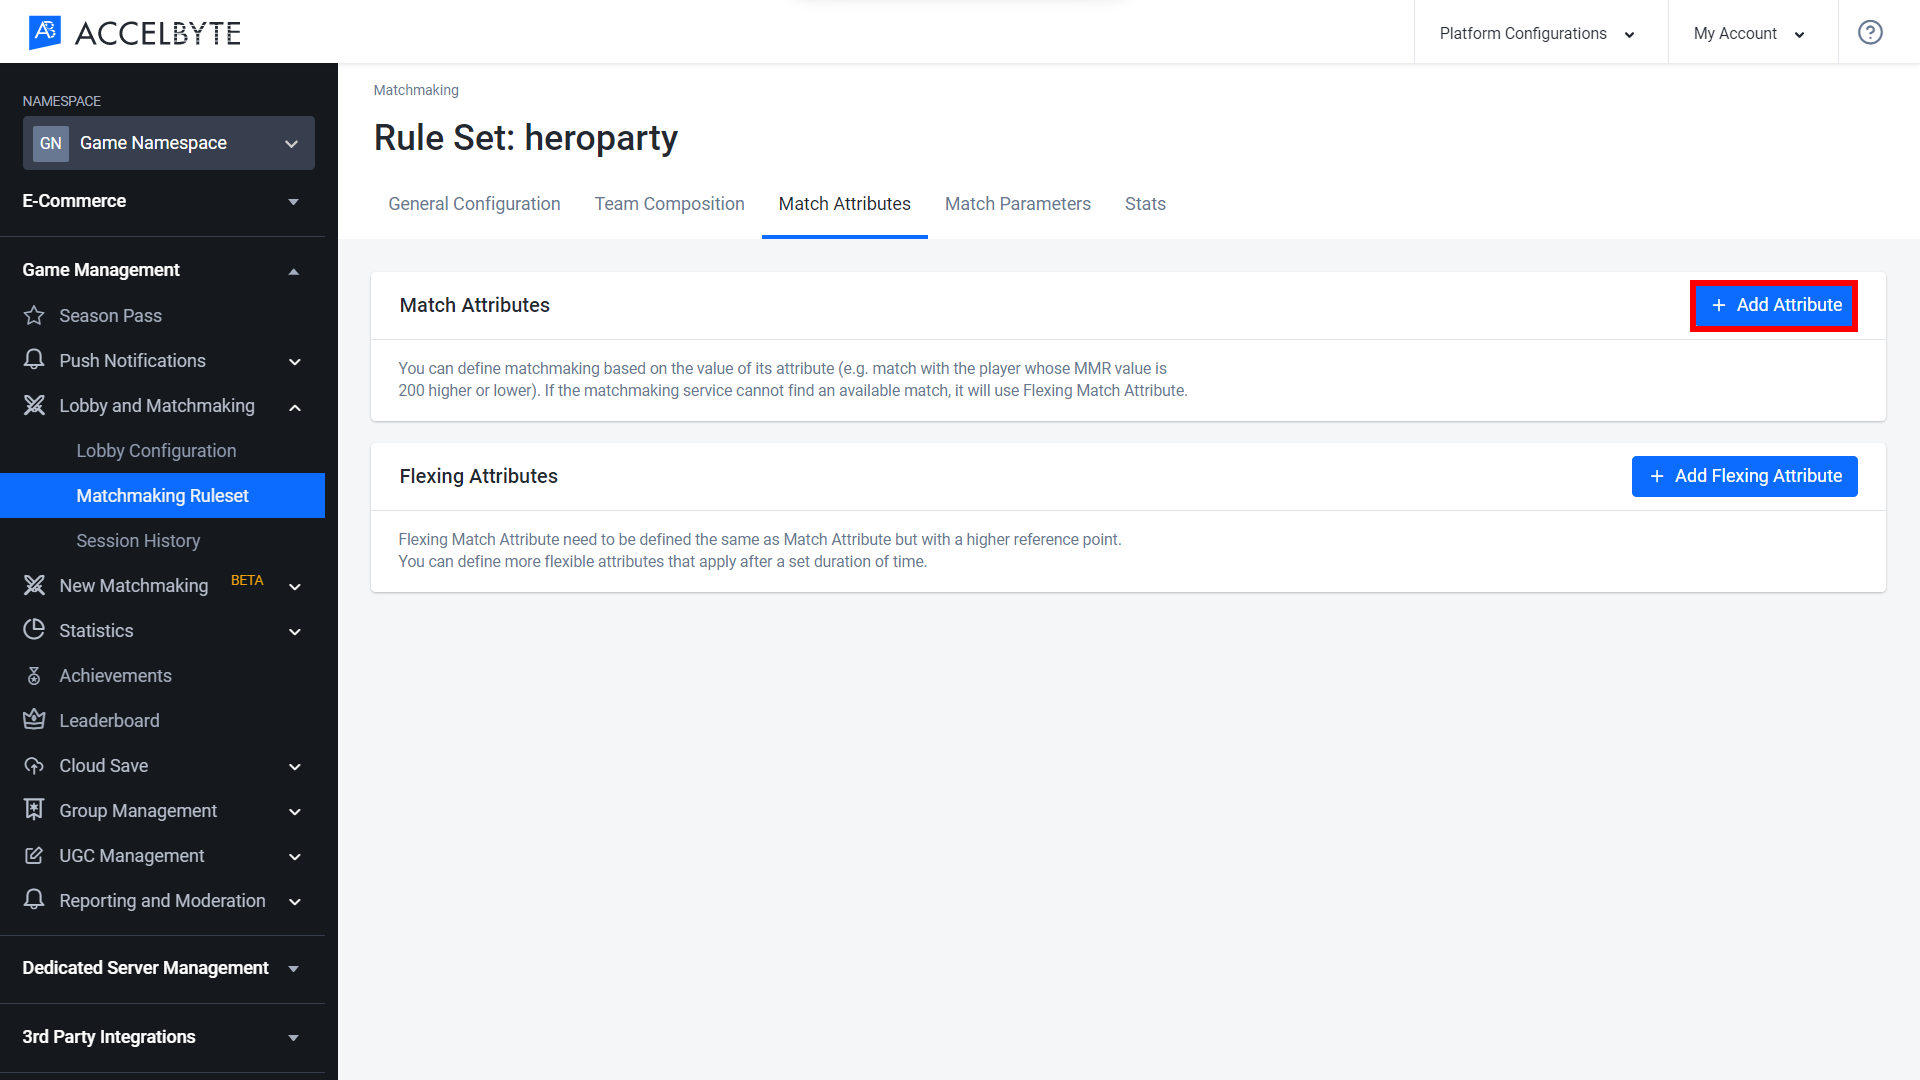
The Add Match Attribute form will appear.
Fill in the required information:
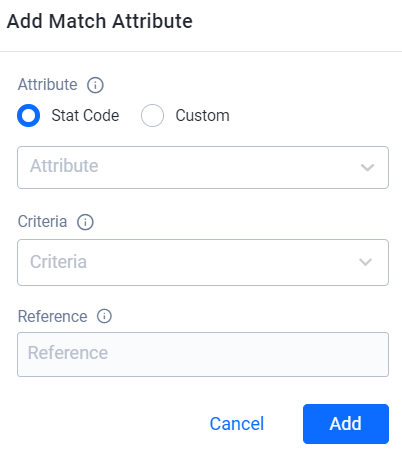
TIP
See our Cloud Statistics (opens new window) documentation for more information on creating statistics.
Once the fields are completed, click Add.
The matching rule will be added to the list.
The following steps below to add flexing attributes:
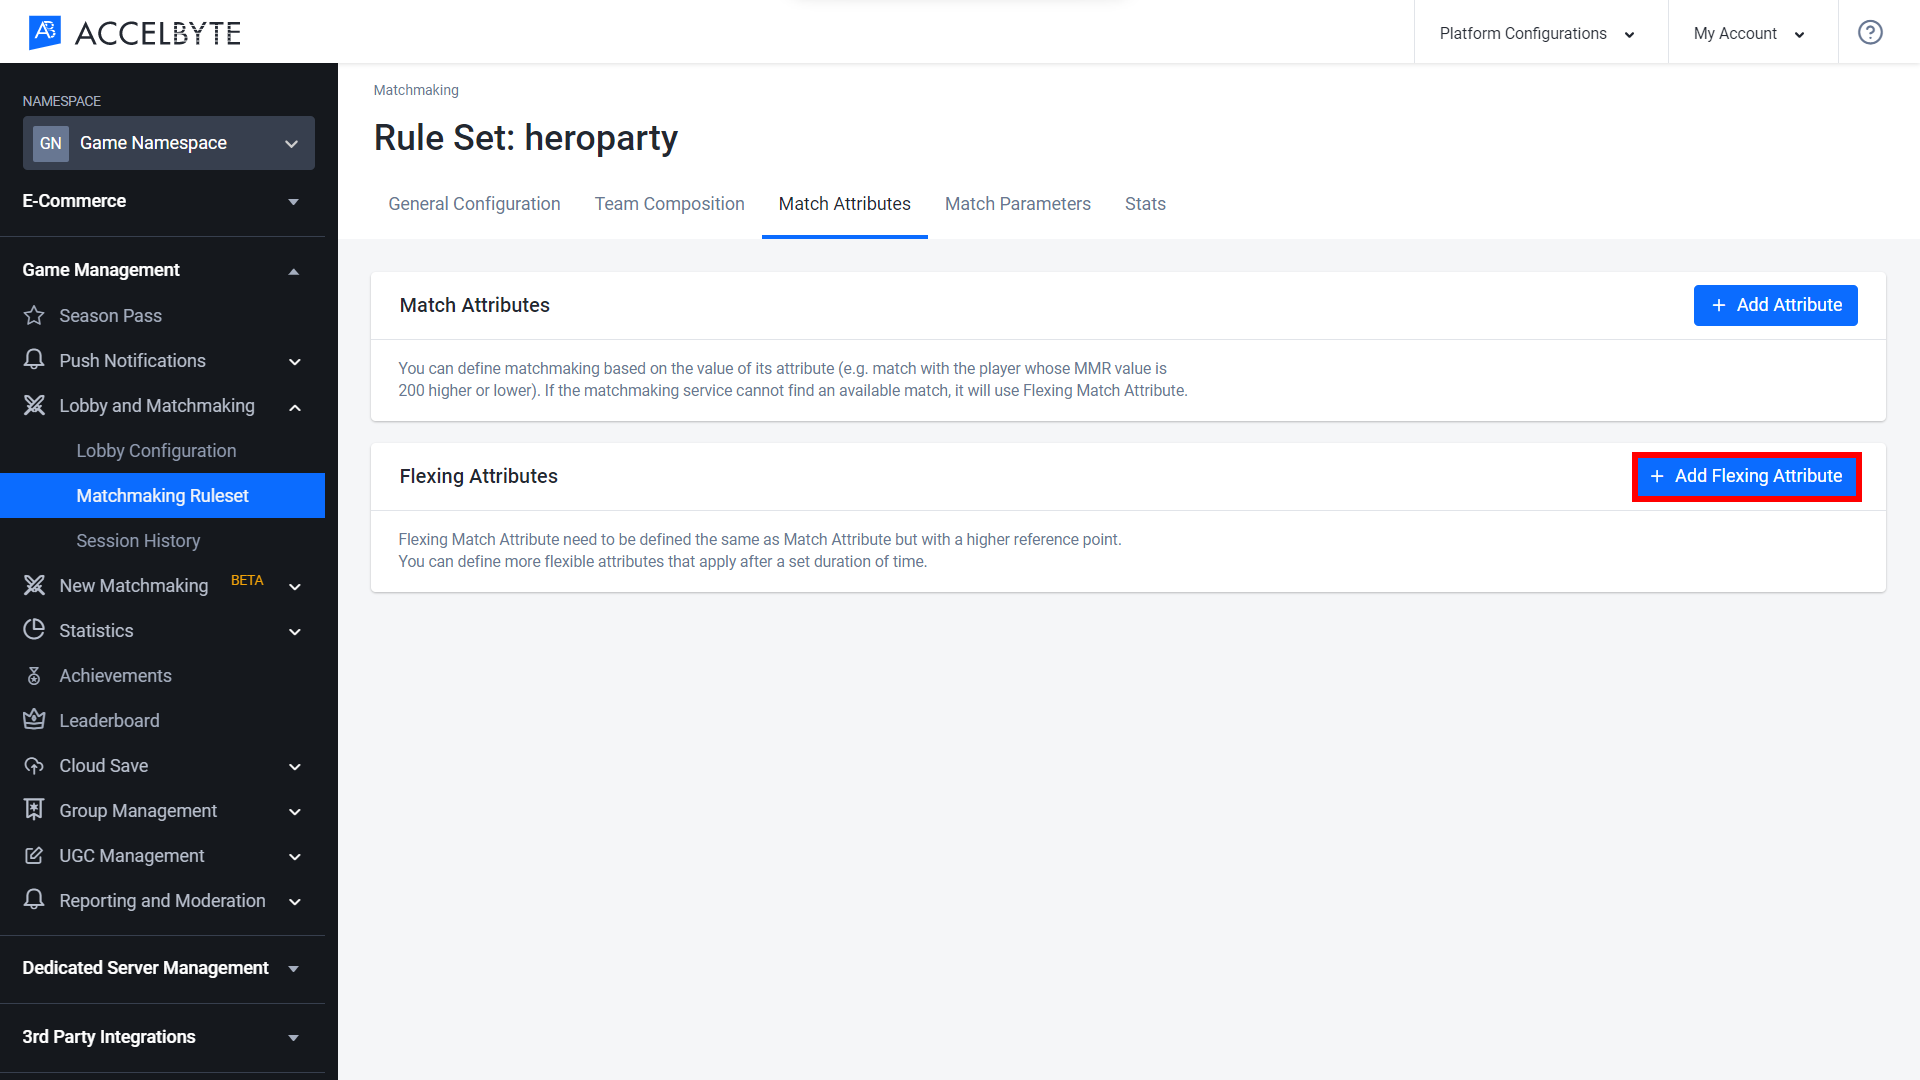
On the Matchmaking Detail page, switch to the Match Attributes tab.
In the Flexing Match Attributes section, click the Add Flexing Attribute button.
The Add Flexing Attribute form will appear.
Fill in the required fields.
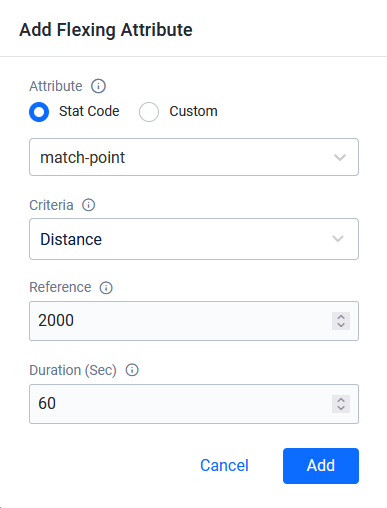
Once the fields are completed, click Add.
The new flexing attribute will be added to the list.
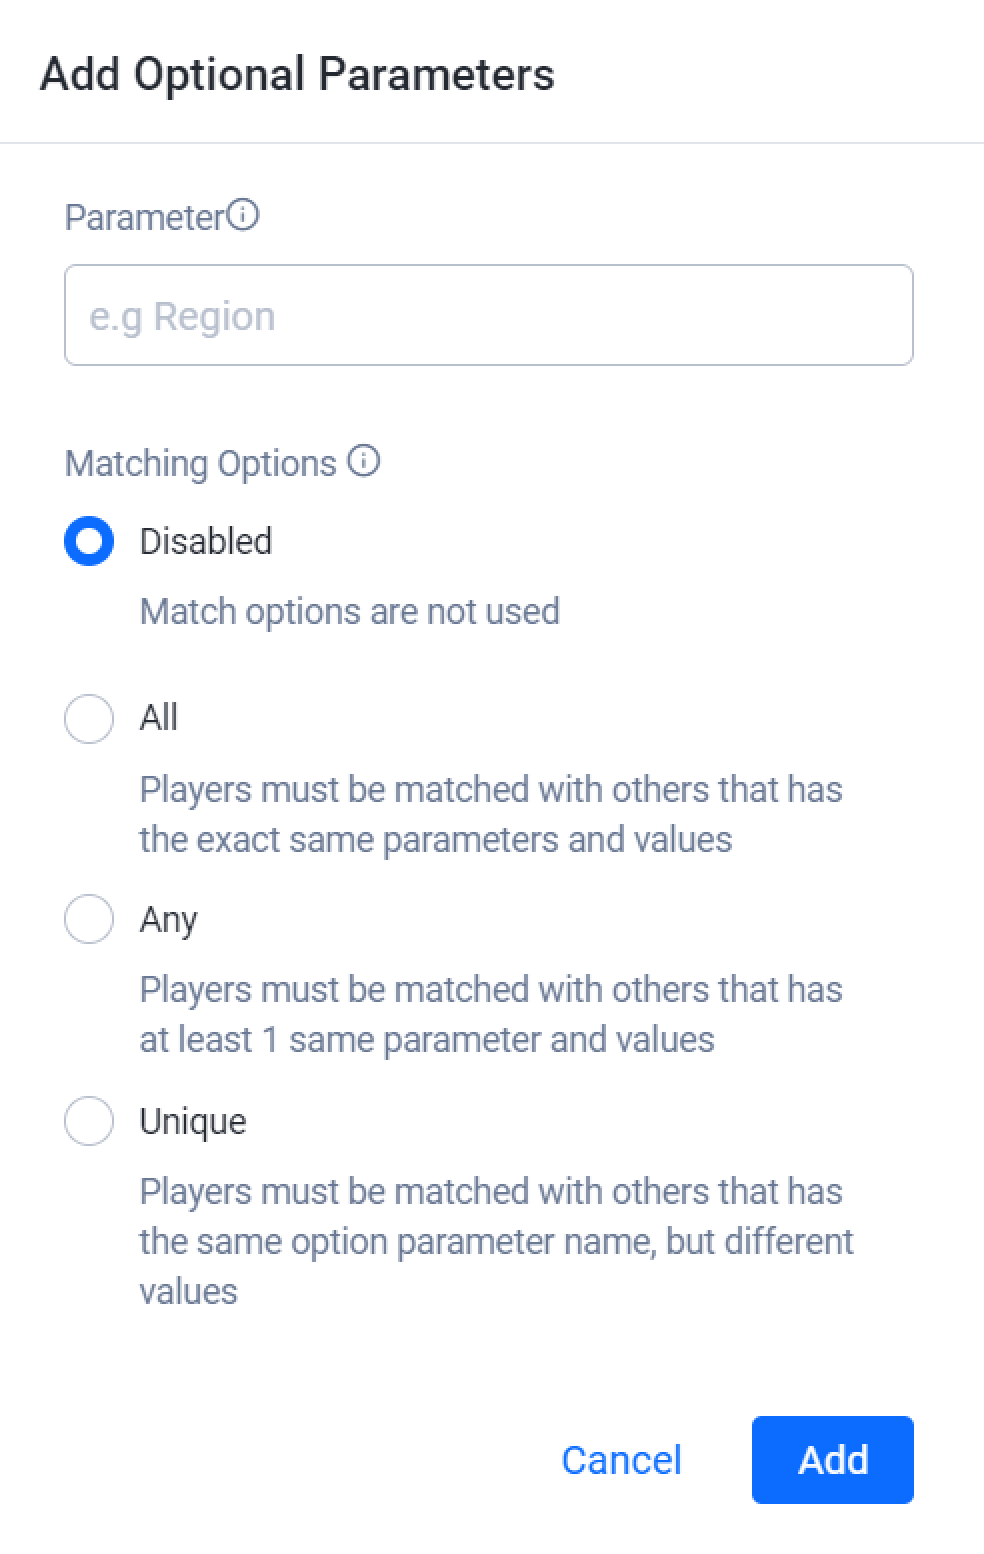
You can add optional parameters to your matchmaking rules by first defining the parameters you want, such as Region or Player Level. Then you define whether players should be matched when all of the chosen parameters match, when any of them match, or when none of them match.
To add optional parameters to your Matchmaking Rules, follow the steps below:
On the Matchmaking Ruleset page of the Admin Portal, scroll down to the Optional Parameters section at the bottom of the page.
Click Add Optional Parameter.

The Add Optional Parameters form will appear.
Fill in the required information:
Once the fields are completed, click Add Parameter.
The parameter you created will appear in the Optional Parameters list in the Matching Rules panel at the bottom of the page.
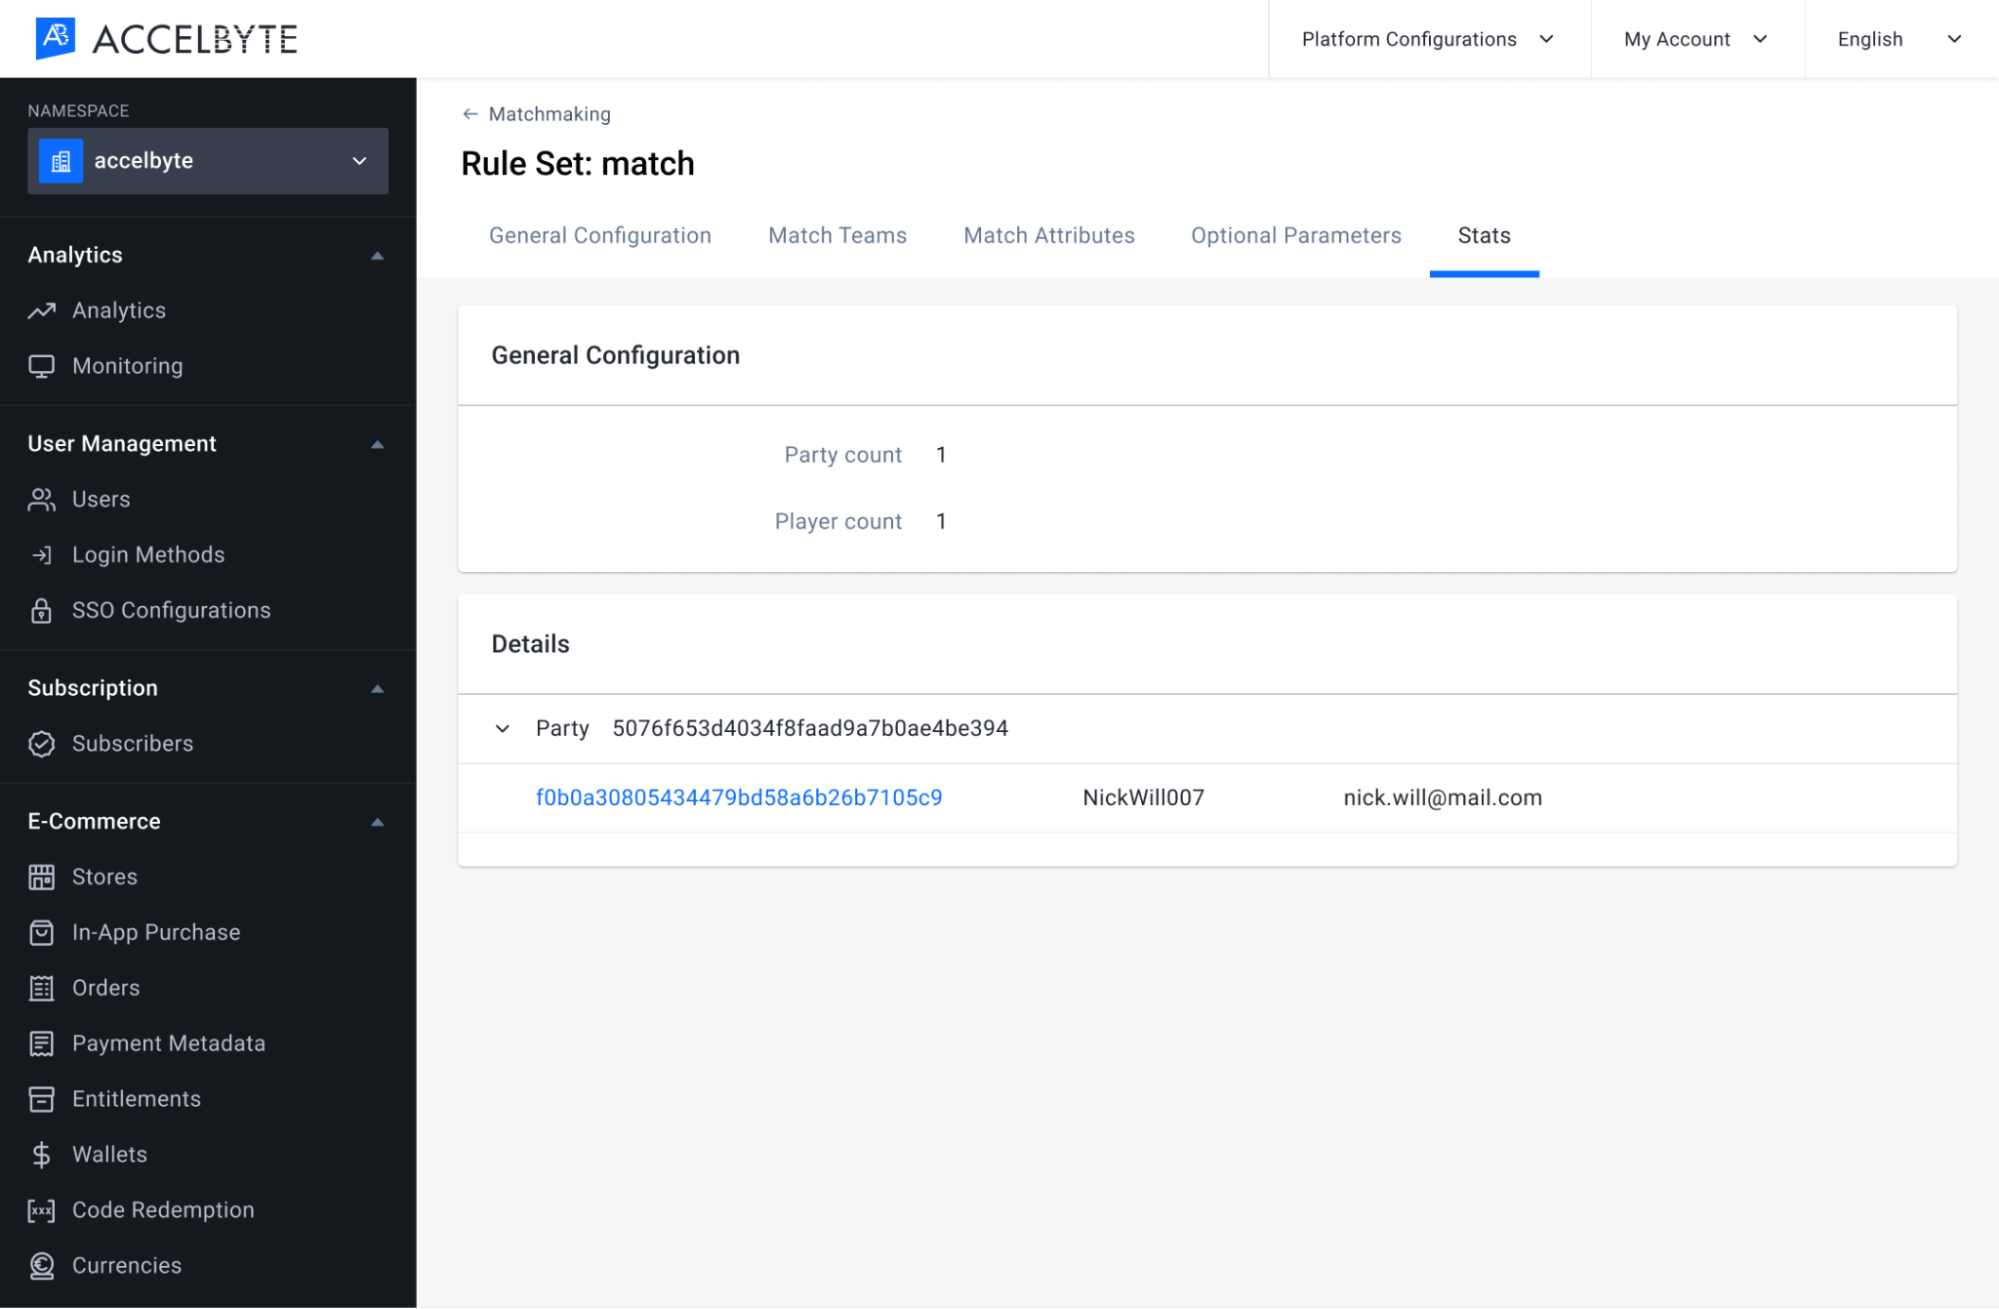
In this panel you can see all the detailed information about a matchmaking session. This is real-time data, so you need to let the player start matchmaking before you can see the details in the panel.
Follow the steps below to see the Stats page:
In the matchmaking detail page, click the Stats tab to go to the matchmaking stats.
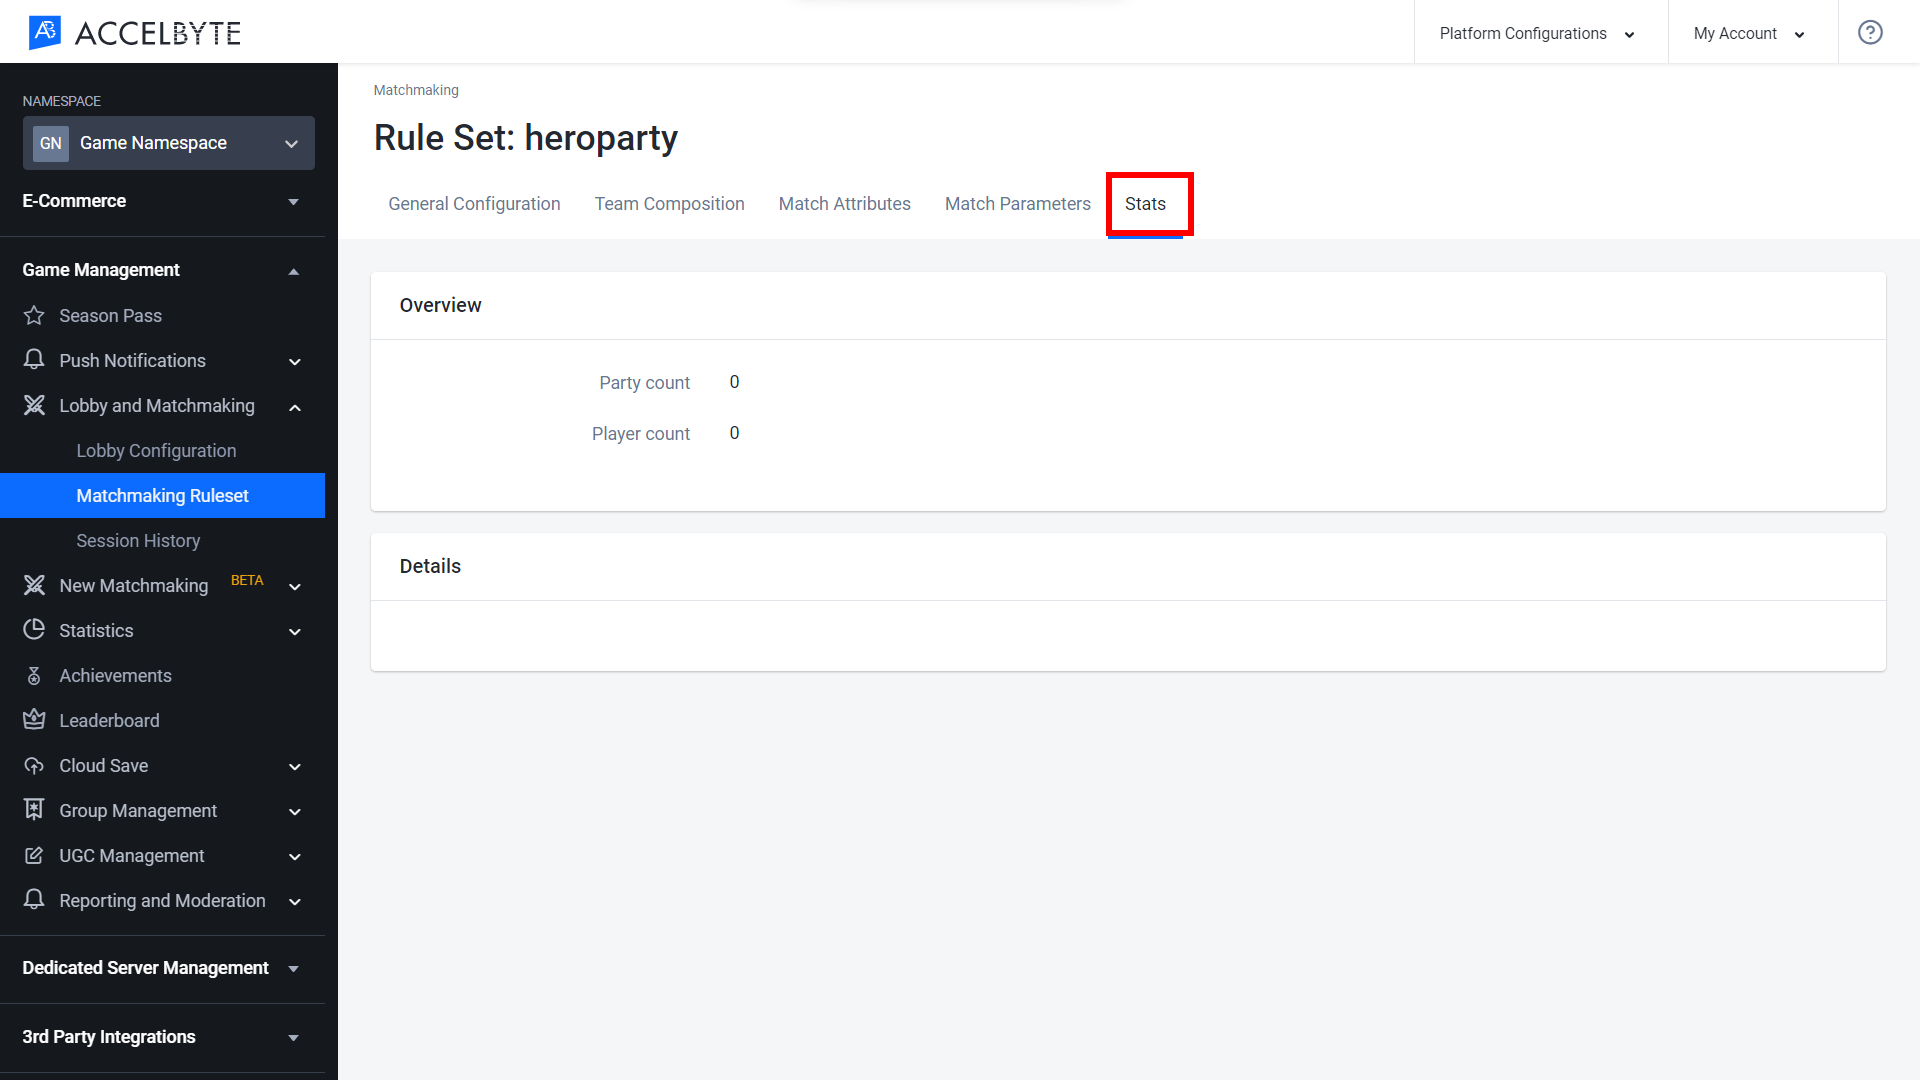
The Stats page will show you details of the current match, including party ID, user ID.
Click on the user id to see the detailed information about the player.
You will only see this page when the current session is in the matchmaking queue. Once a match is found, the content in this Stats tab will disappear.
Follow the steps below to import a Matchmaking Configuration into a game namespace.
In the Admin Portal, go to the game namespace where you want to import the configuration.
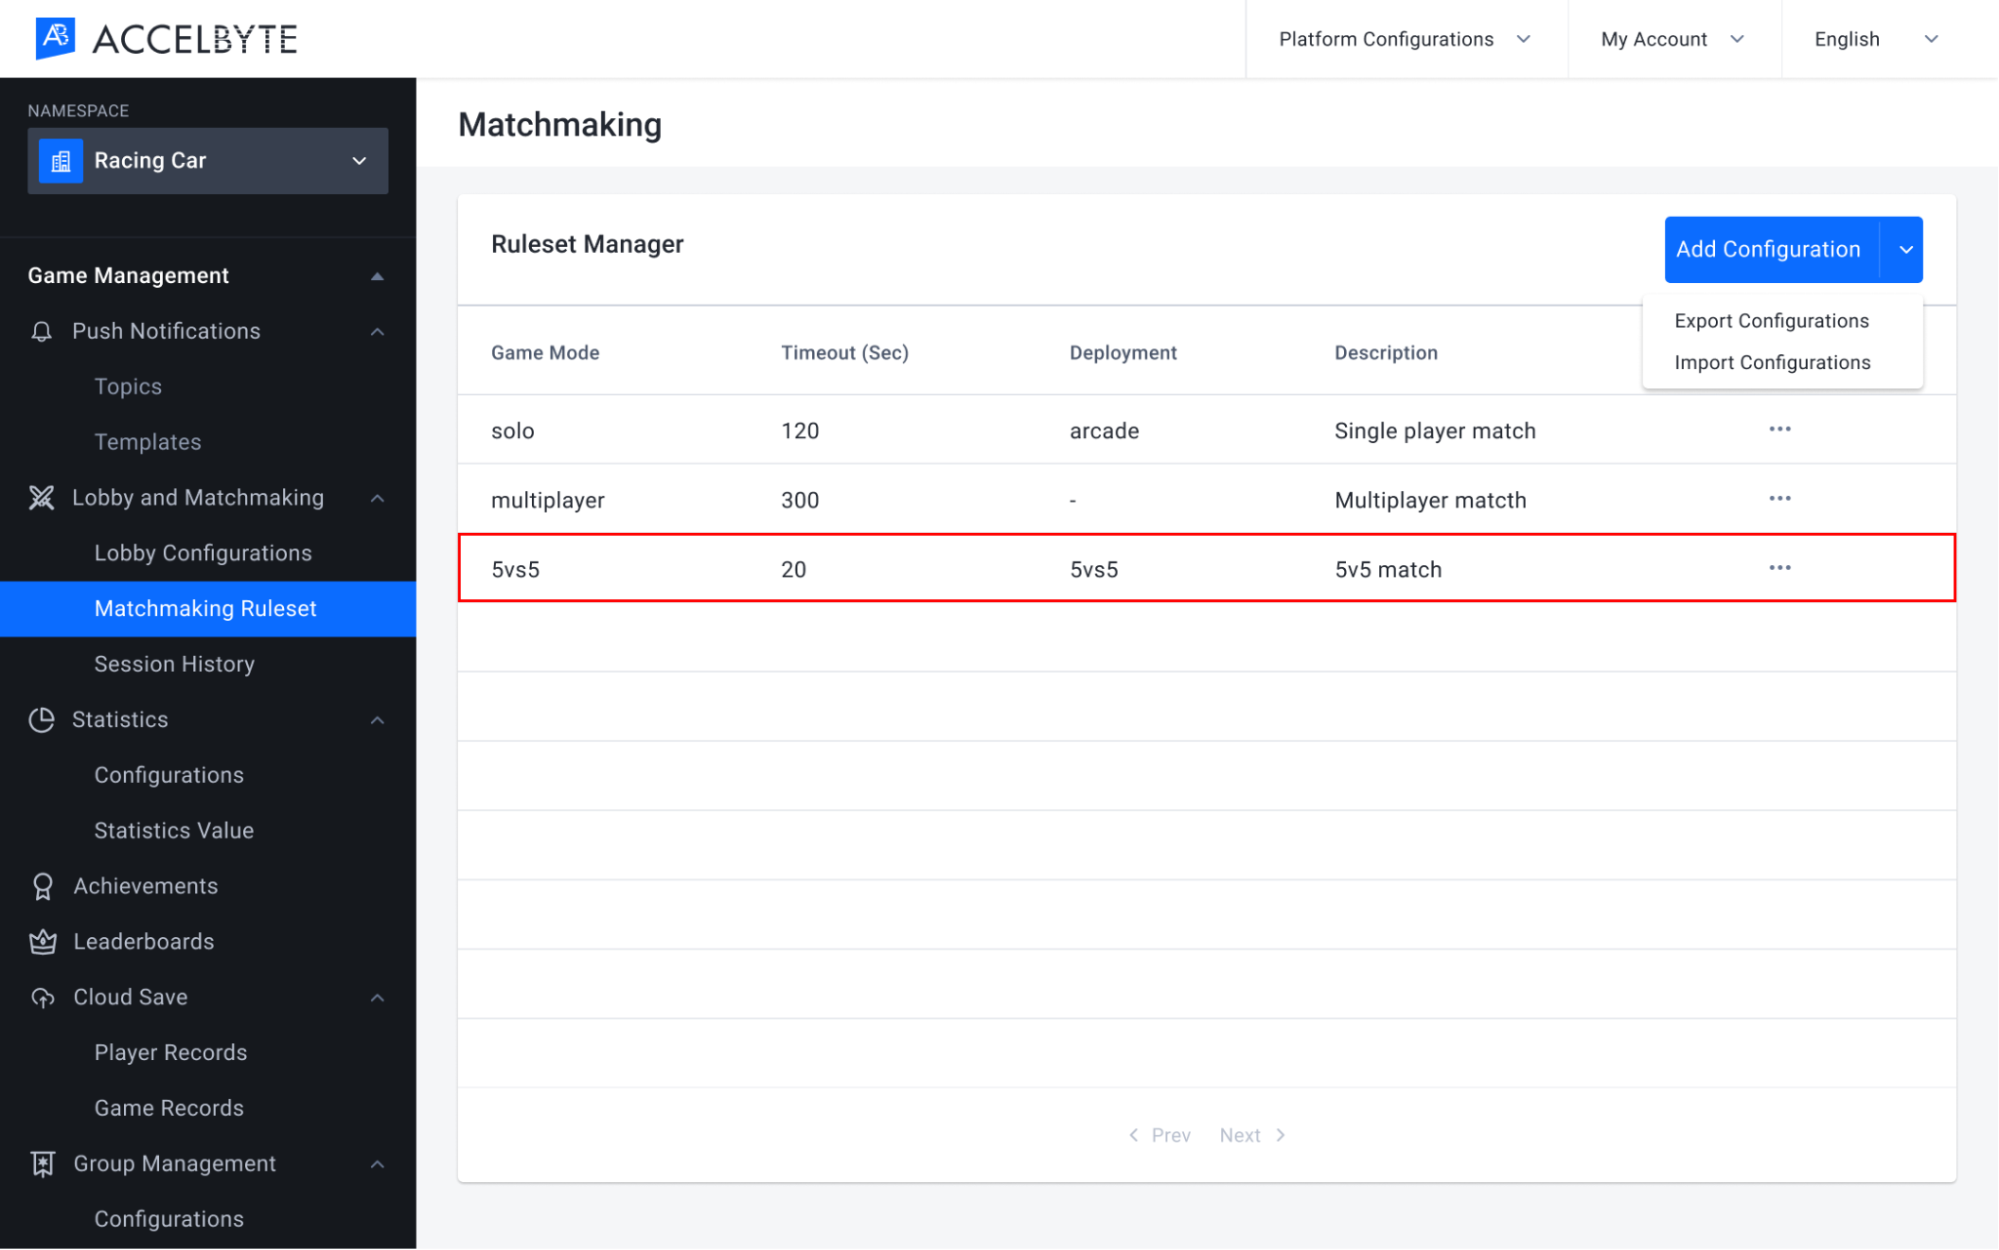
On the Matchmaking page, open the Add Configuration dropdown menu
Select Import Configurations.

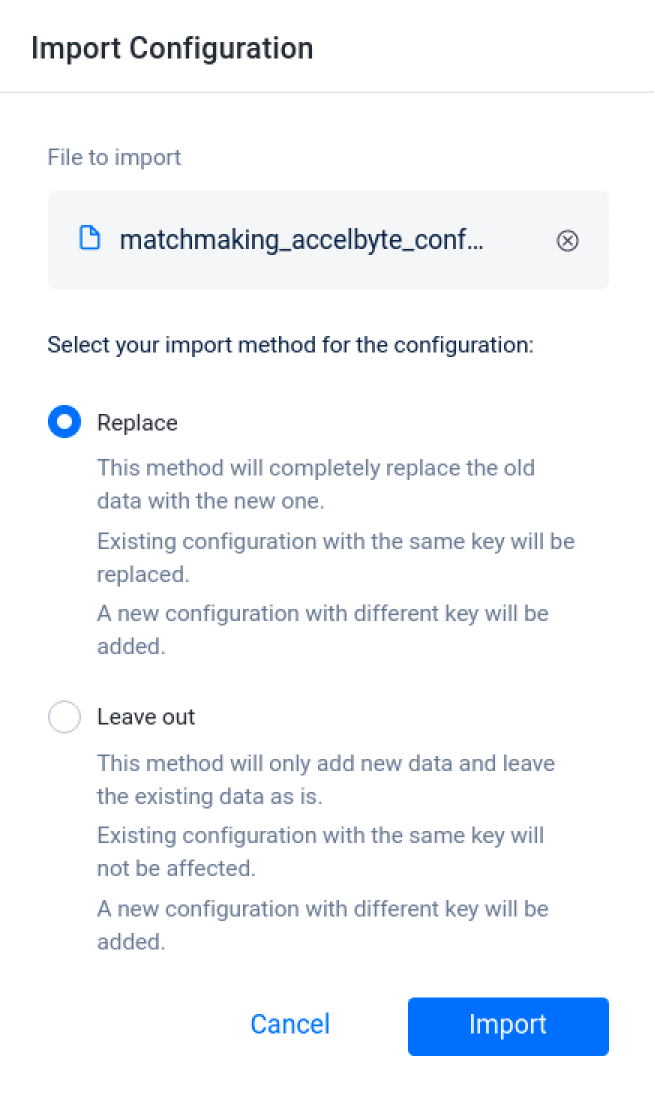
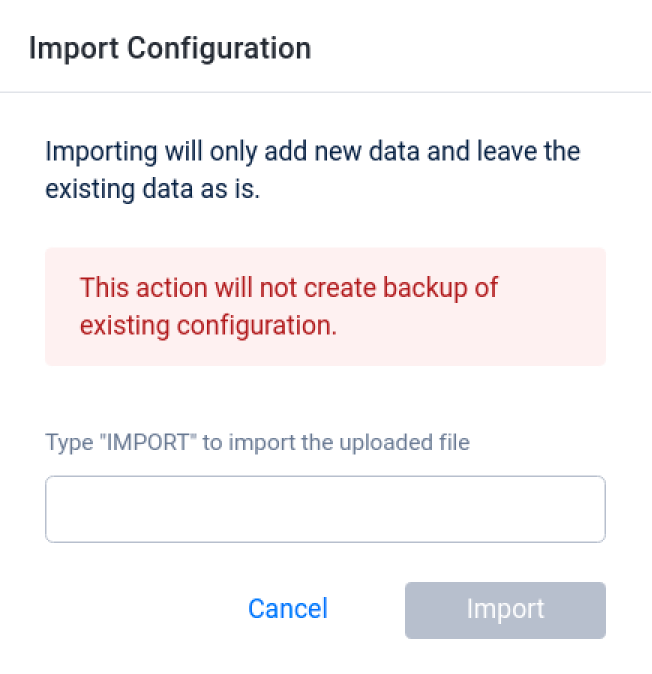
The Import Configuration form will appear.
Select the configuration file you want to import and choose the import method from the options below:
A confirmation window will appear.
To confirm your selection, type IMPORT in the text box and click the Import button.
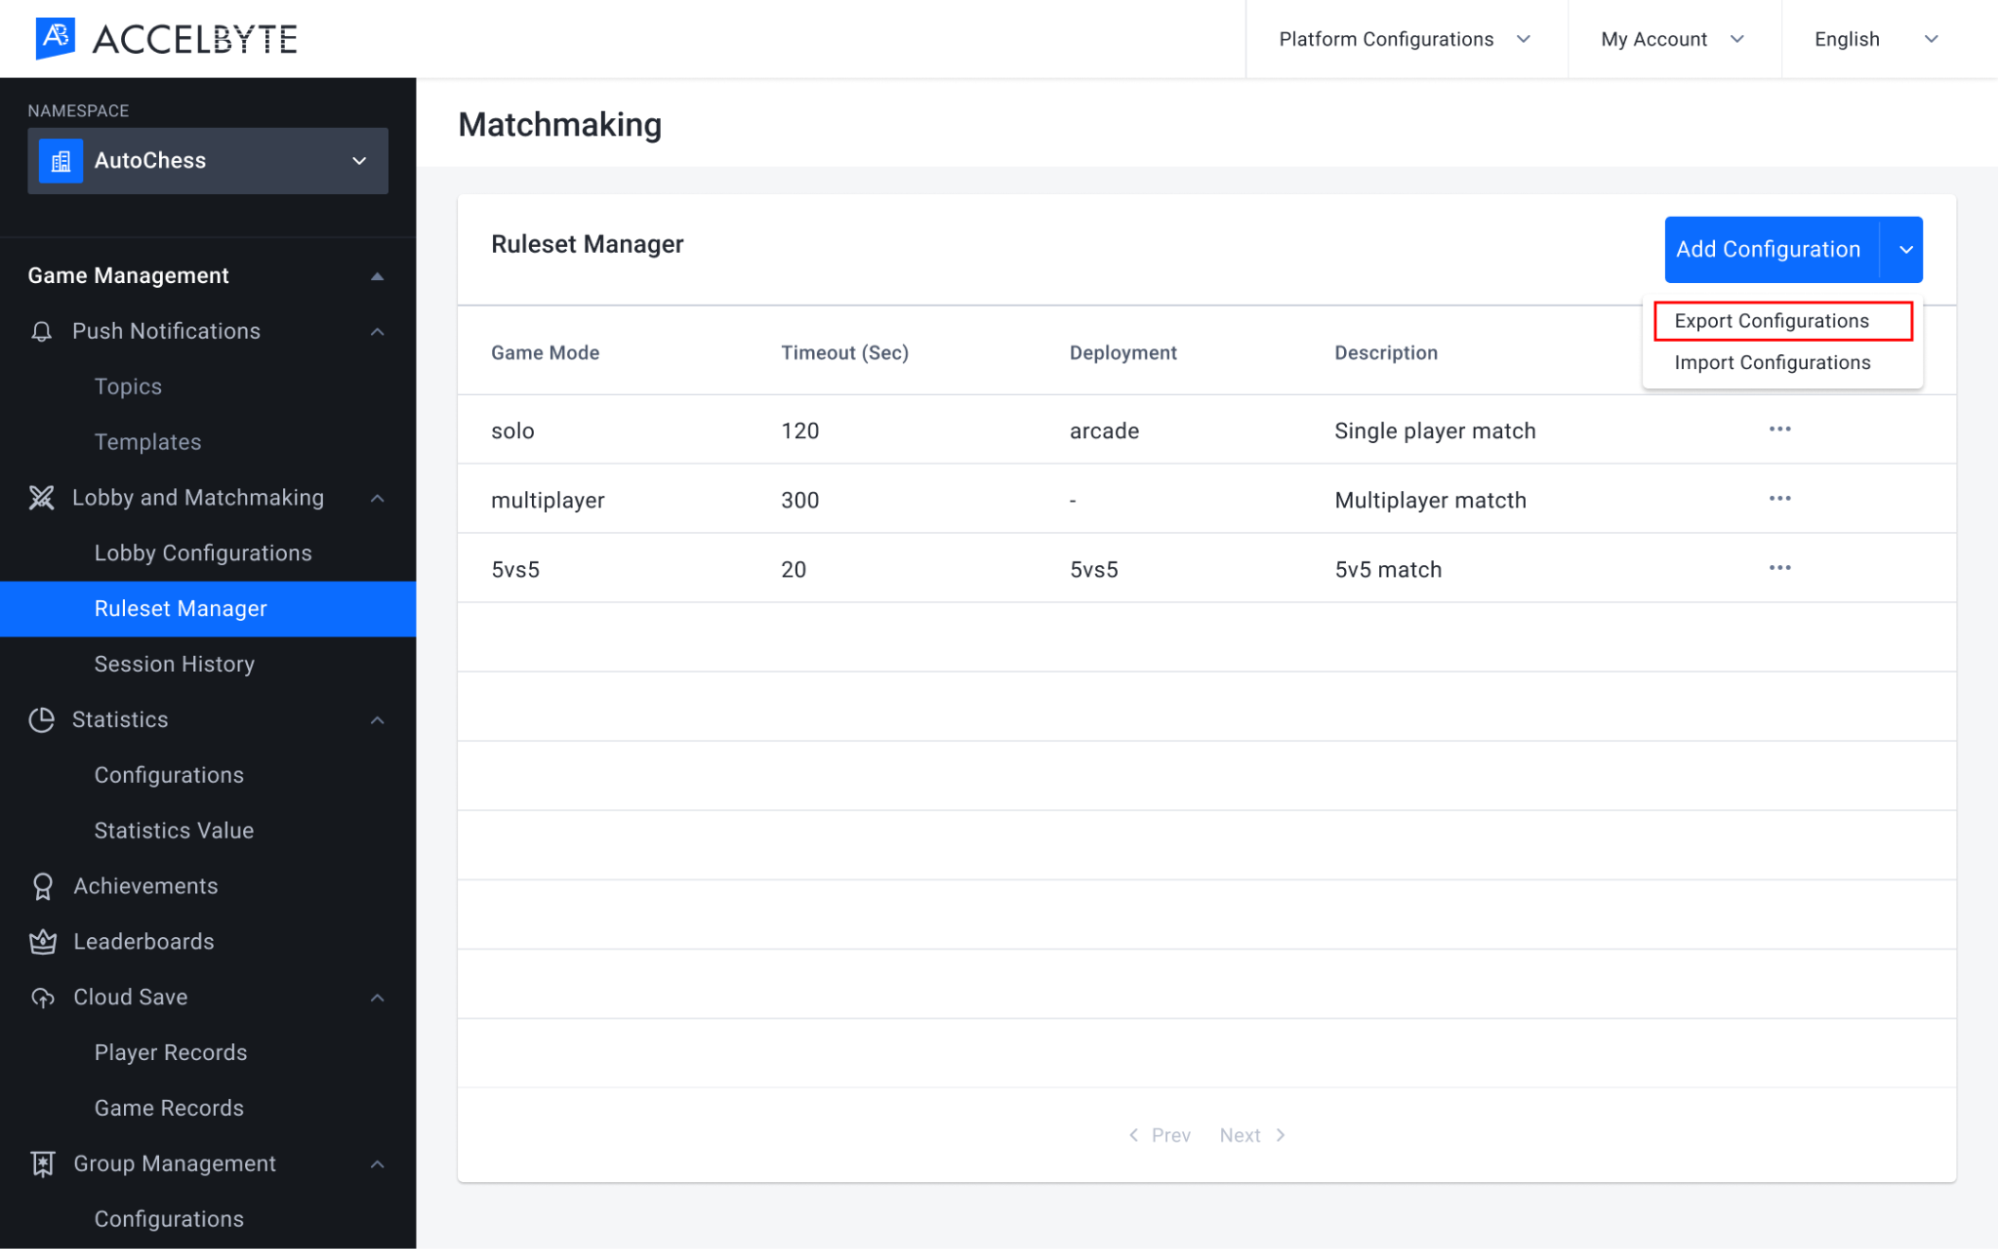
Here you can see the configuration has been added to the namespace.
IMPORTANT
If you use our Dedicated Server Manager Armada, don’t forget to also import your Dedicated Server Configuration. You will need both configurations in this namespace to use Armada.
Follow the steps below to export a Matchmaking Configuration from a game namespace:
In the Admin Portal, open the game namespace that contains the configuration you want to export.
On the Matchmaking page, open the Add Configuration dropdown menu.
Select Export Configurations.
Your matchmaking configuration will be exported in a JSON file. Here is an example of the contents:
IMPORTANT
If you use our Dedicated Server Manager Armada, don’t forget to also export your Dedicated Server Configuration. You will need both configurations if you want to use them in a different game namespace.
You can use session history to see event streamlines in each session like session status and match details.
To see session history details, follow steps below:
In the Admin Portal, open the game namespace where the relevant matchmaking is created or where the session is requested.
Navigate to the Game Management section, click the Lobby and Matchmaking section.
Select Session History.
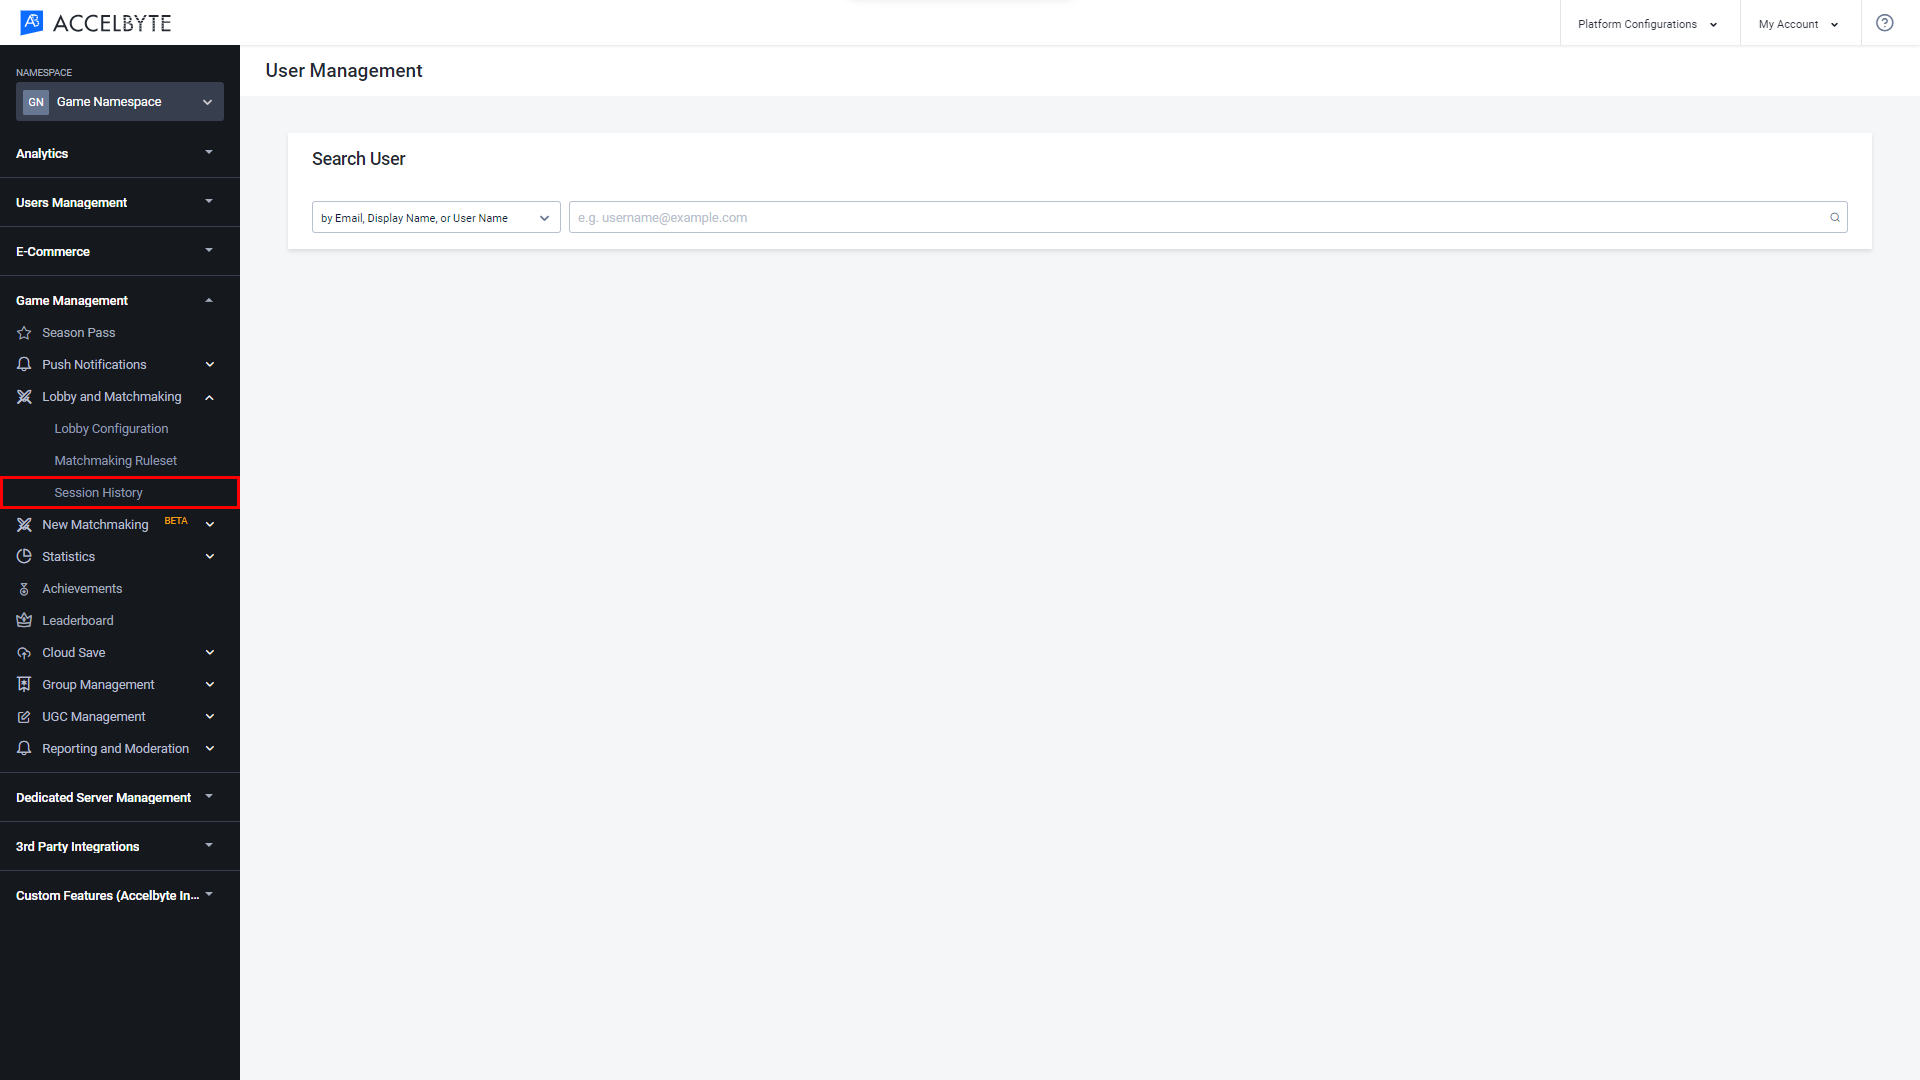
Your namespace’s session history will appear.
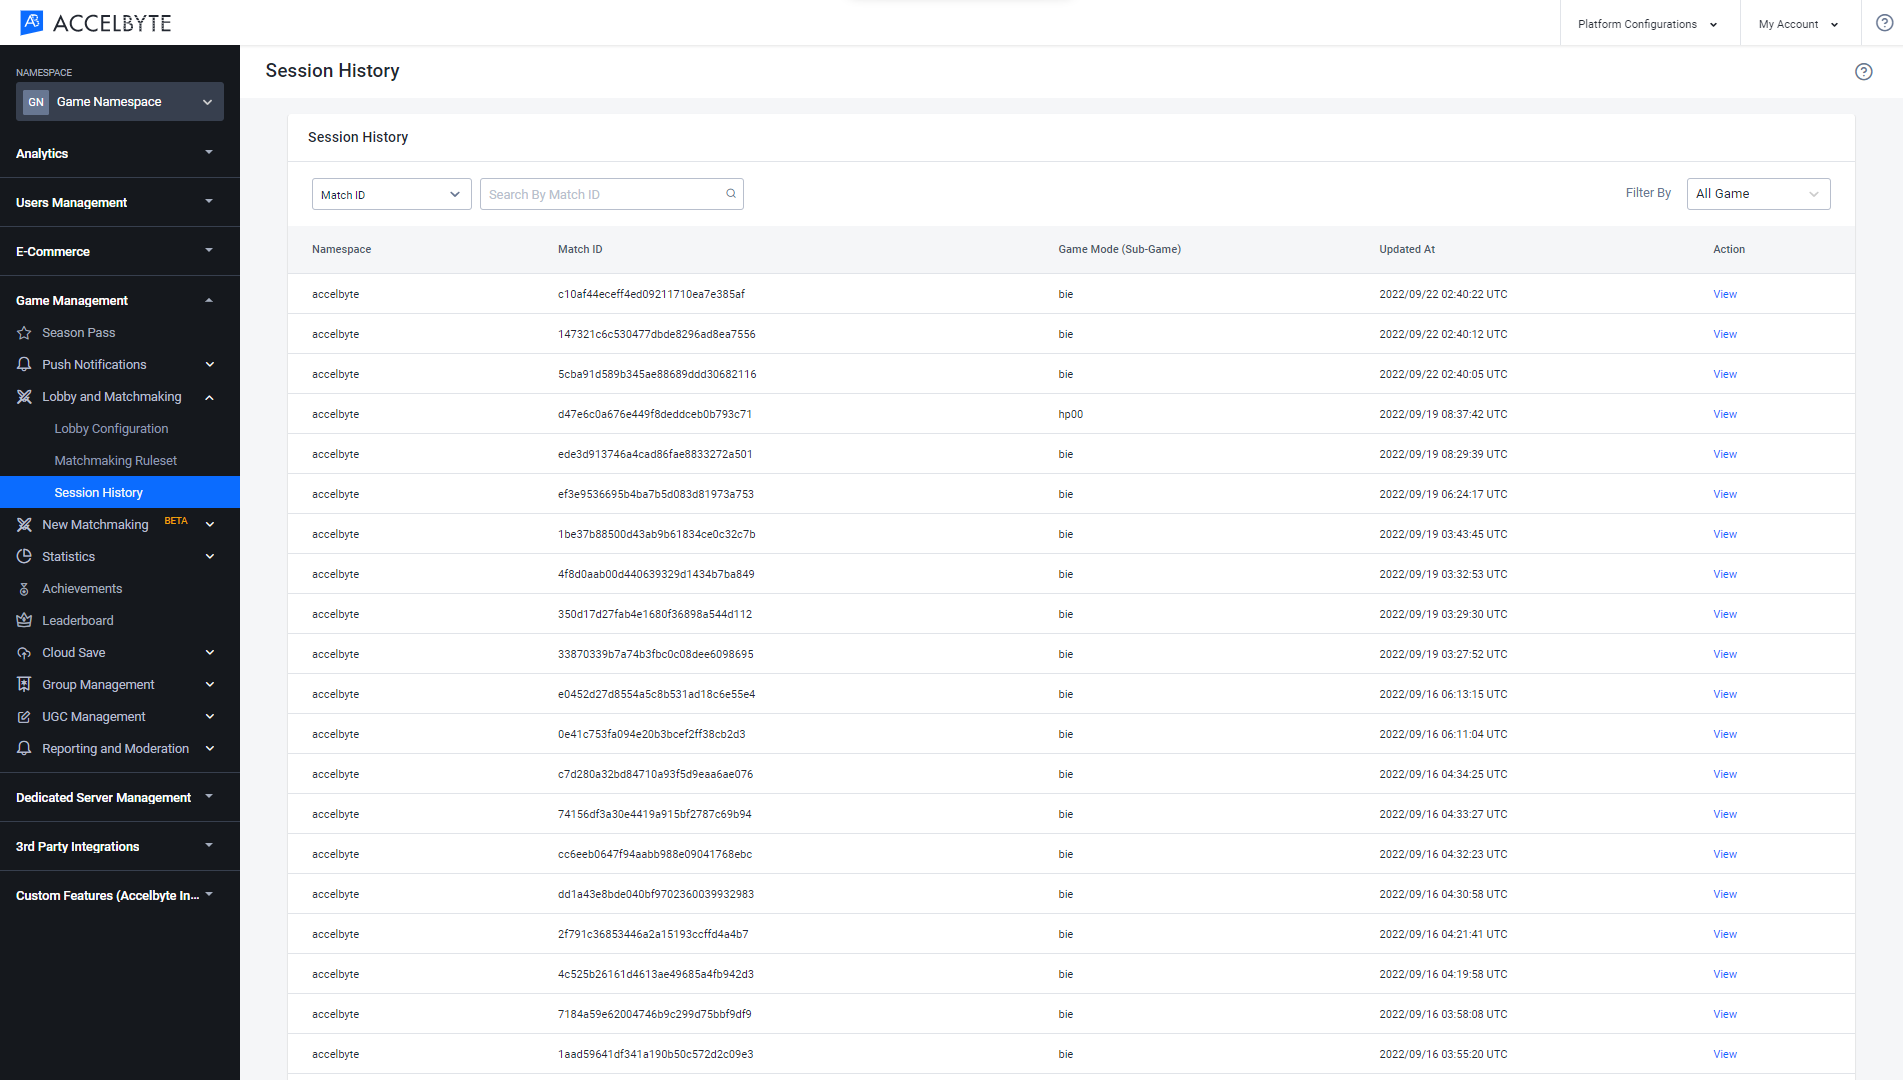
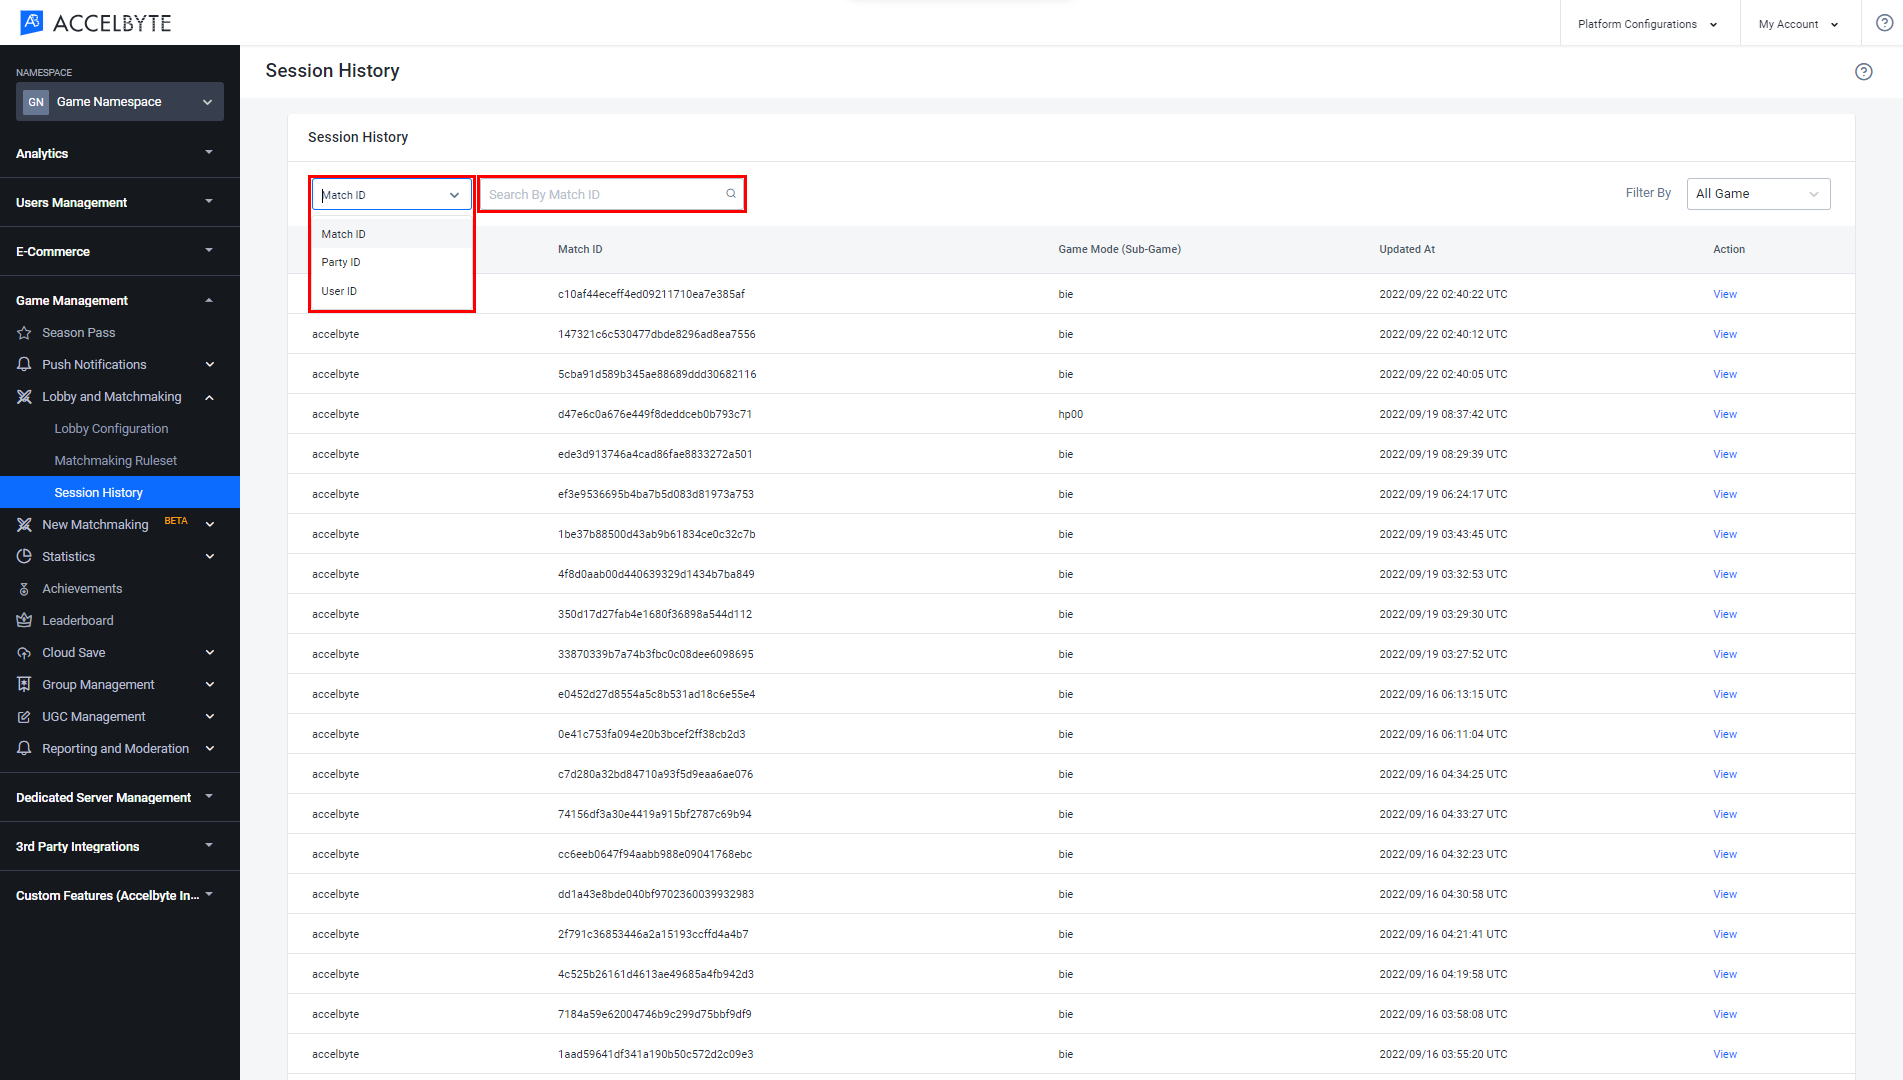
Use the search bar at the top-left to search for sessions based on Match ID, Party ID, or User ID.
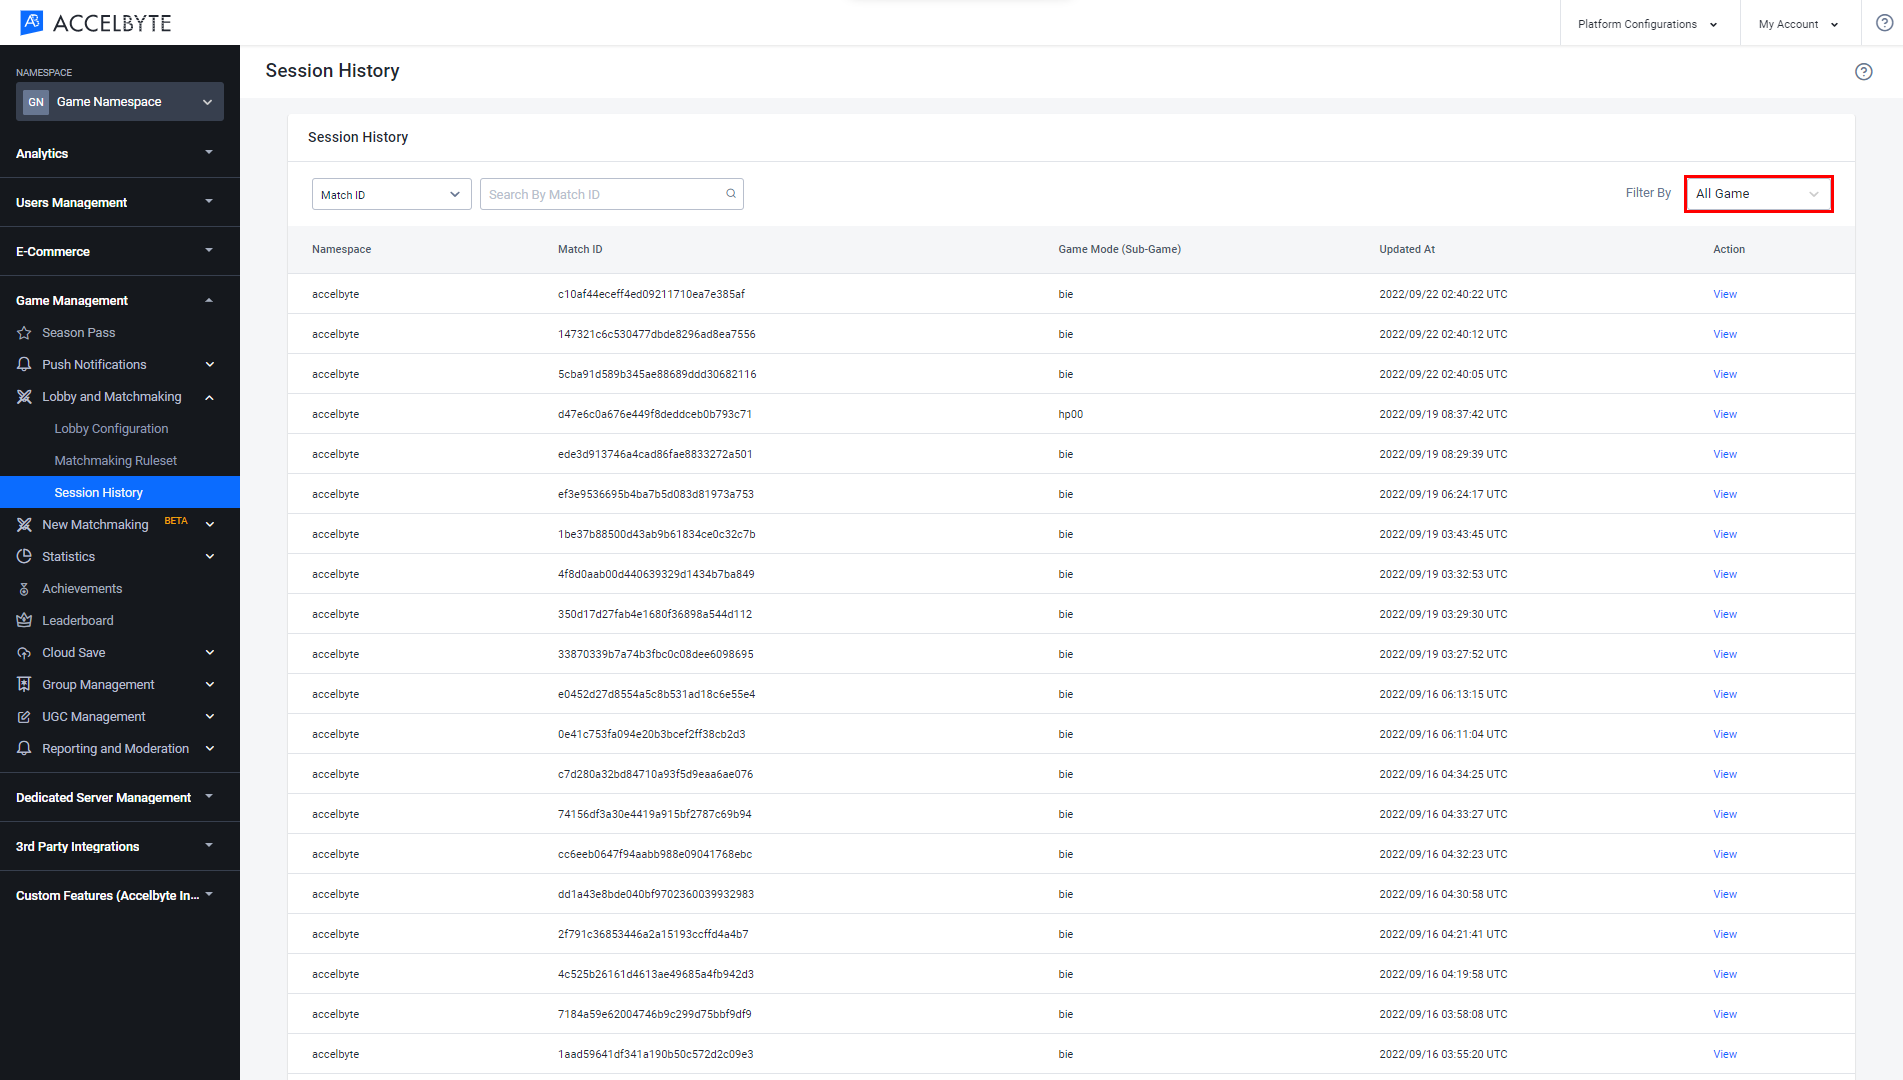
You can also filter the results based on game mode.
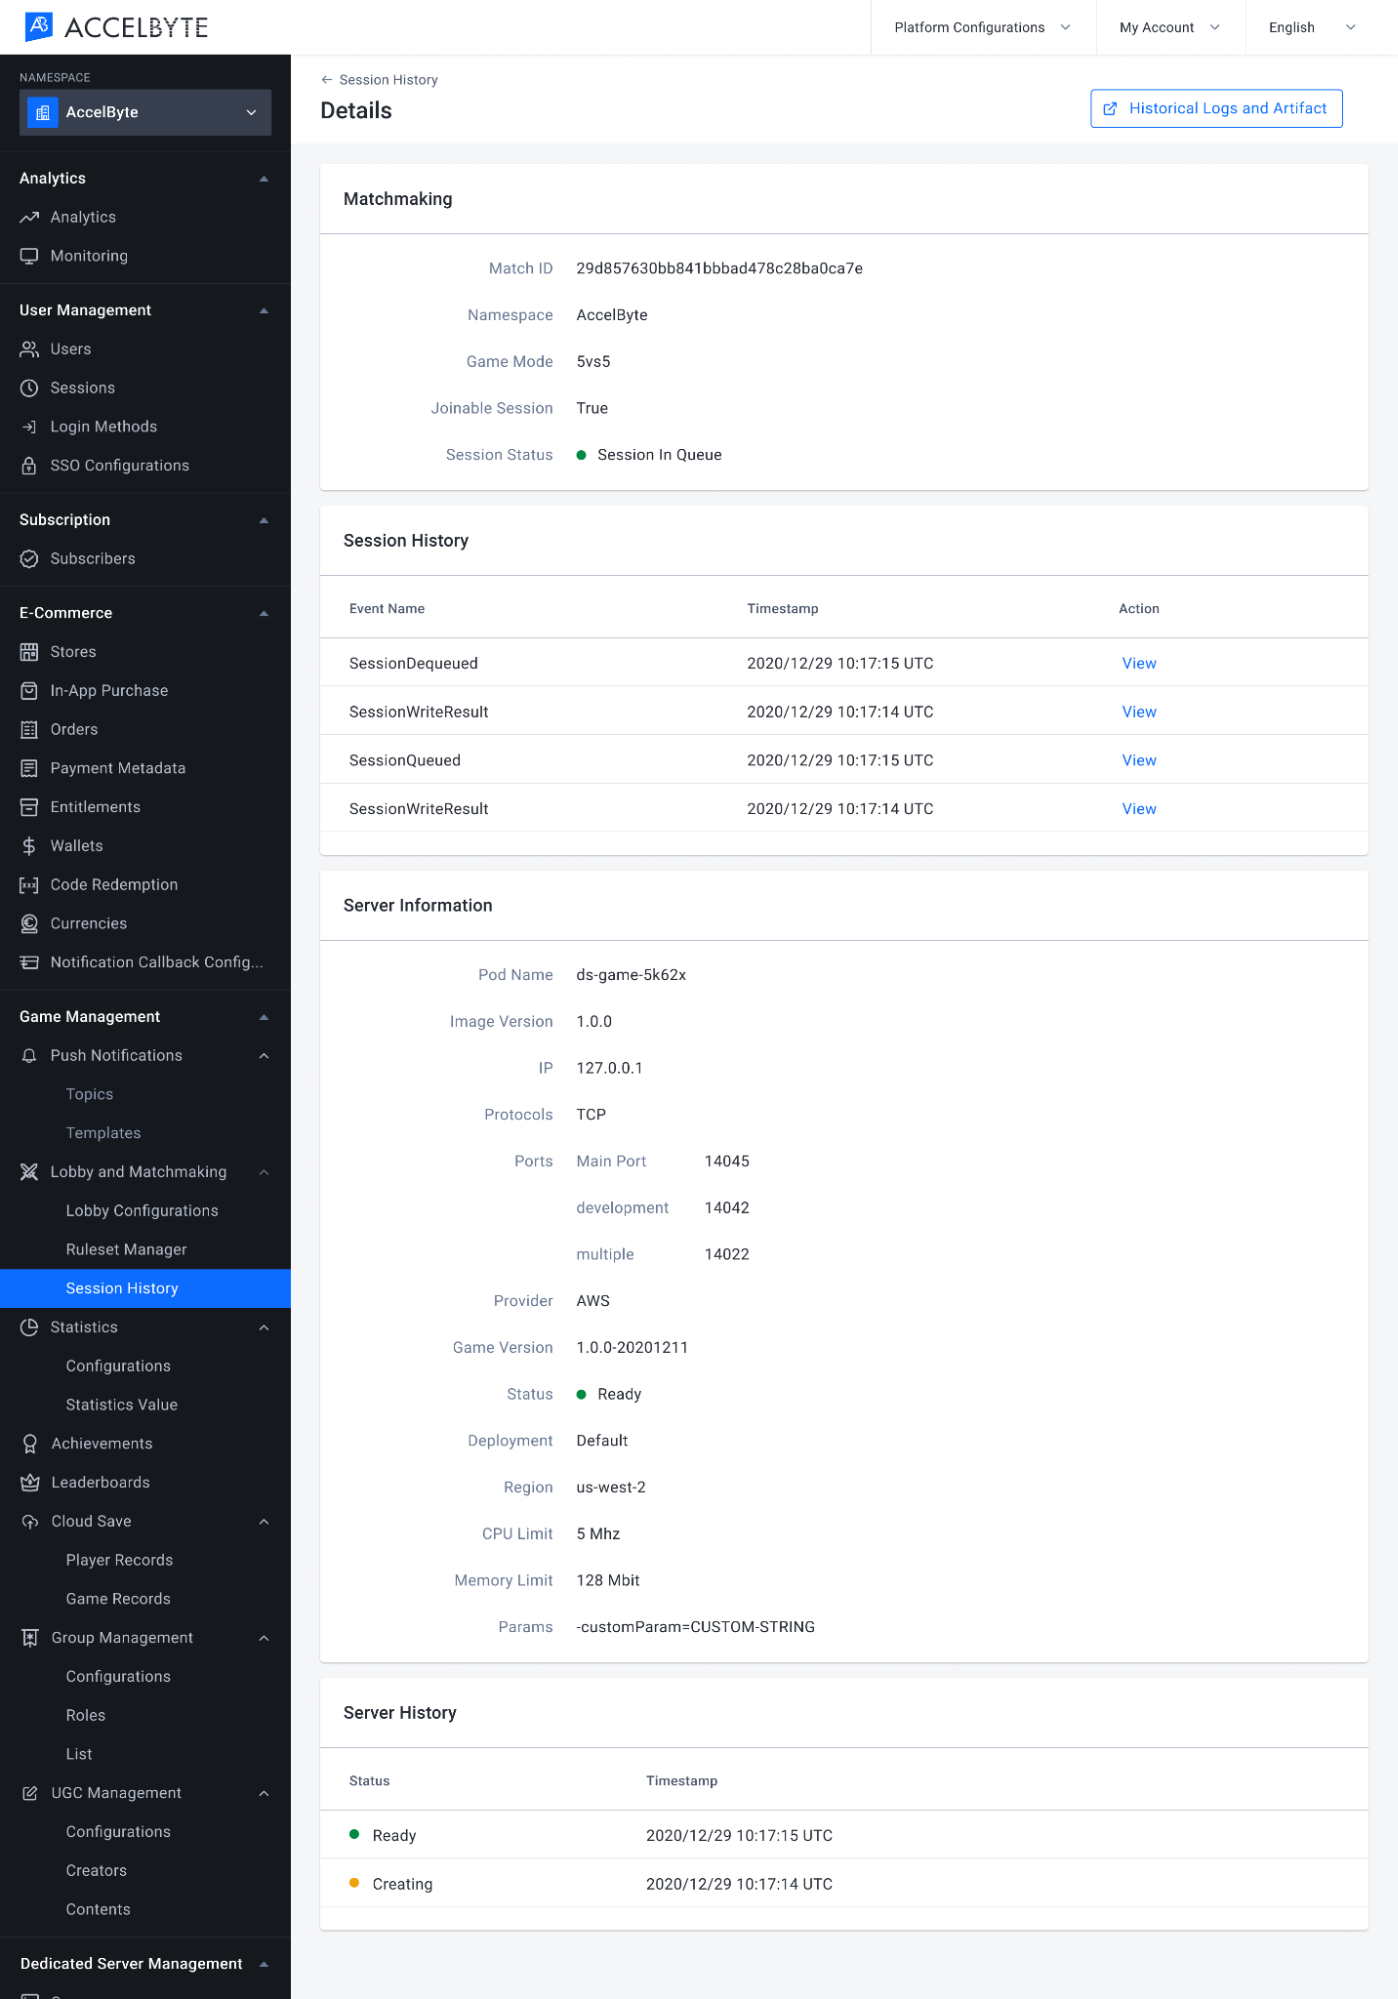
To review the details of a session’s history, click View under the Action column of your chosen session.
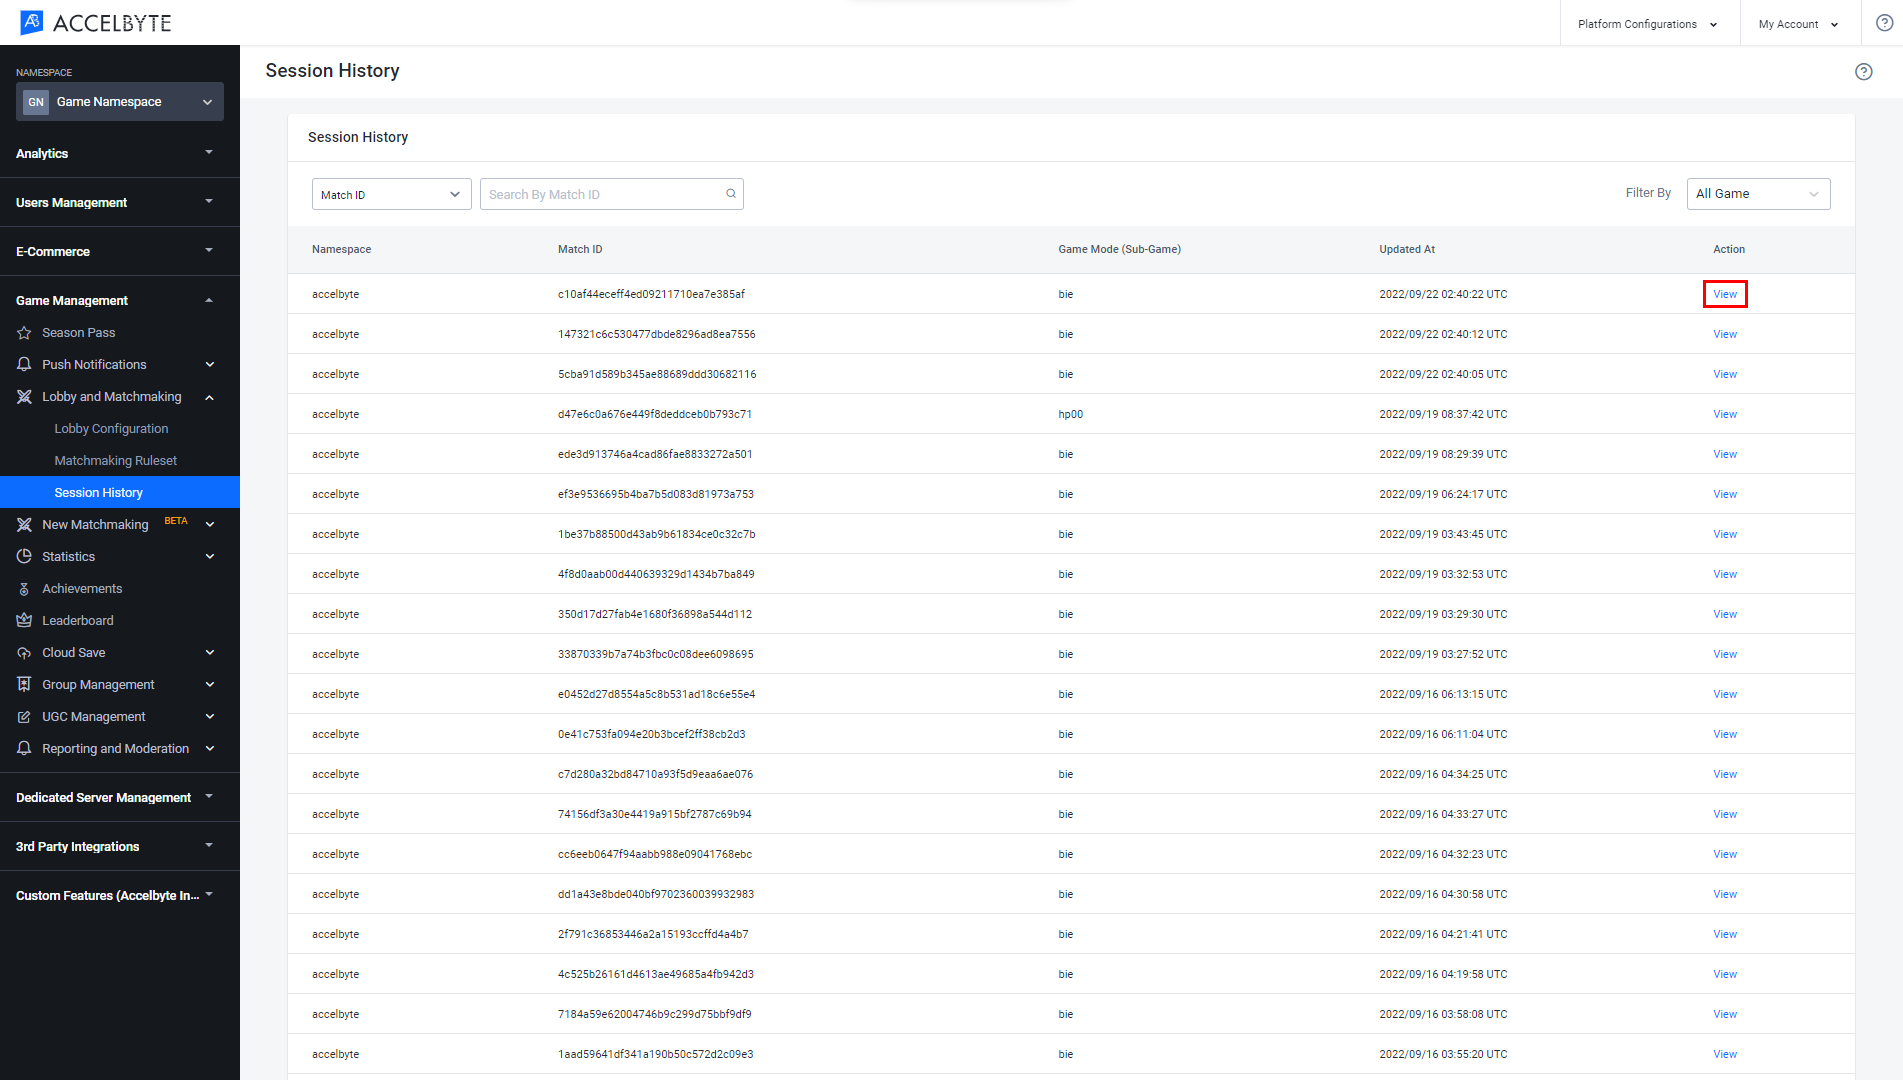
A Details page will appear with details of the selected session’s history including its Matchmaking, Session History Event, Server Information, and Server History.
To view session history event details, follow steps below:
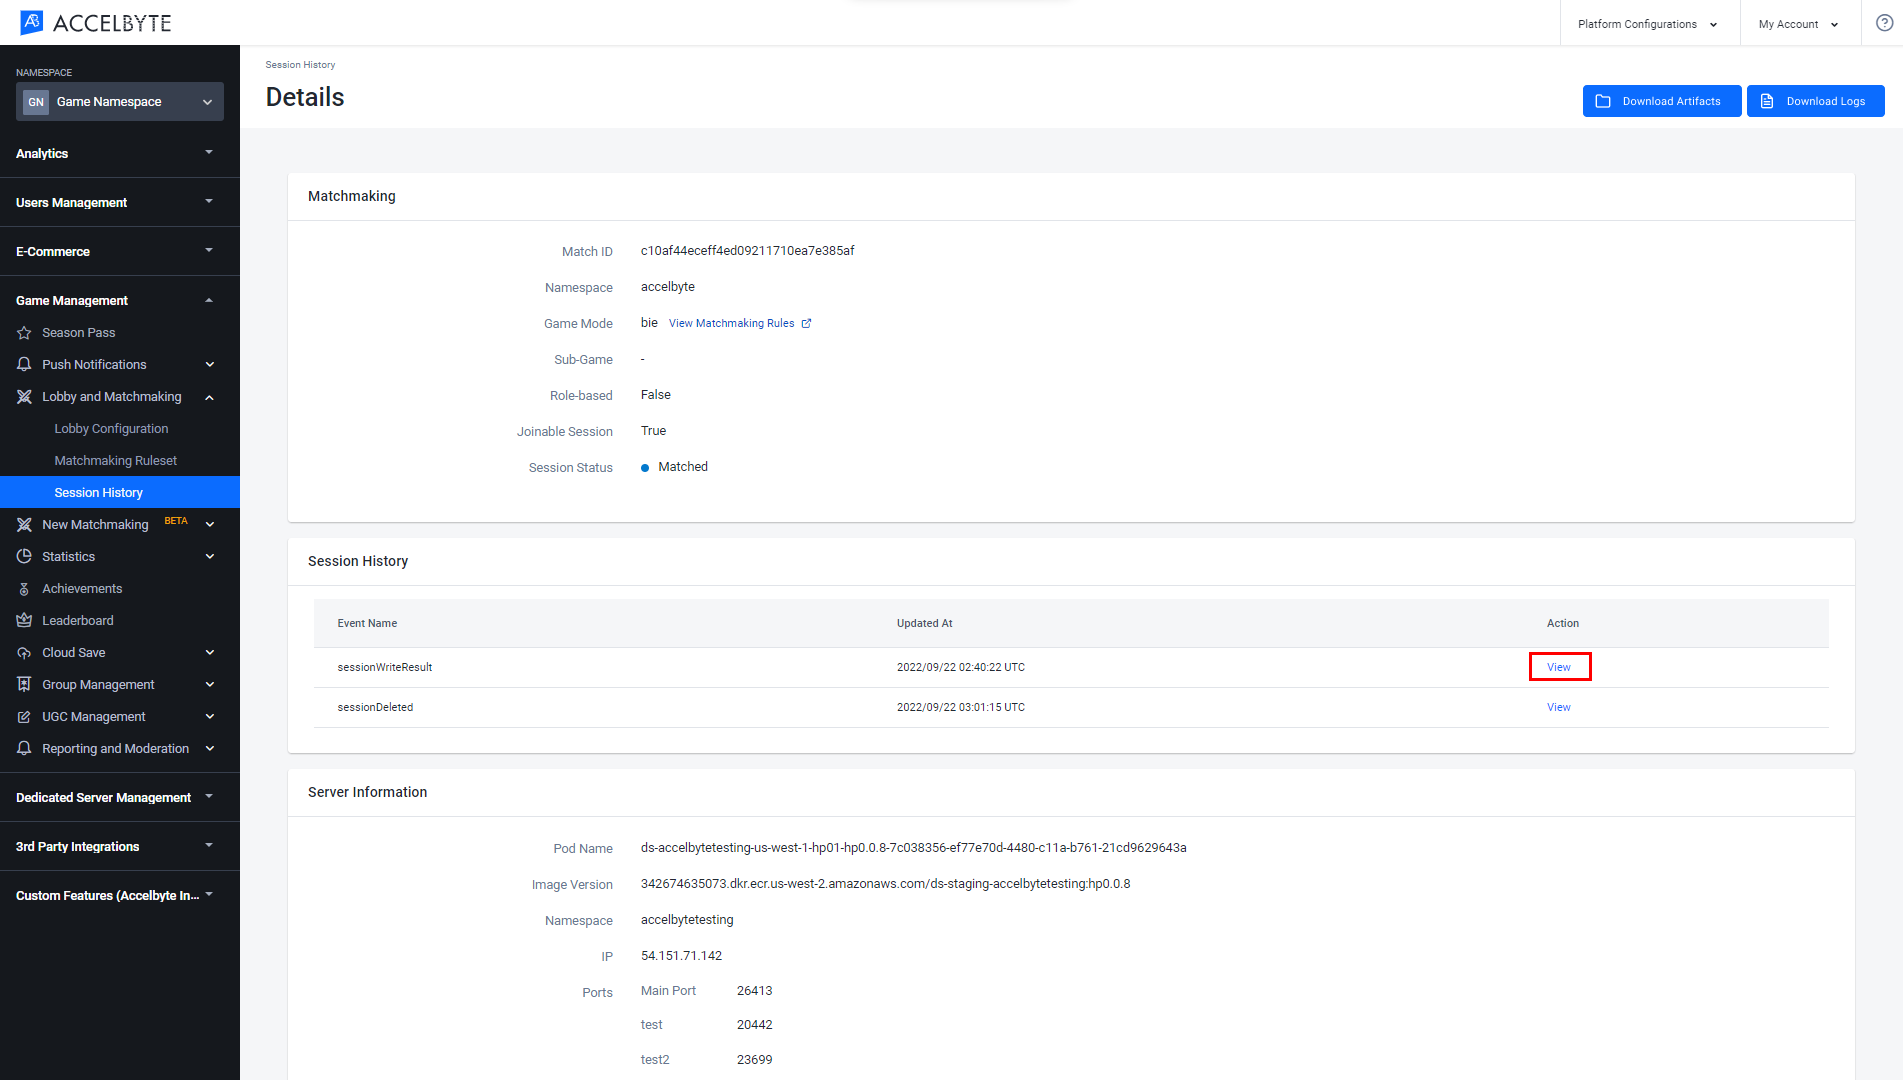
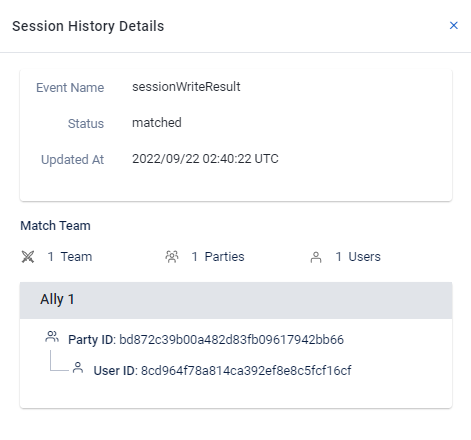
On the Session History Details page, go to the Session History section, choose Event Name, and click View under the Action column.
The Session History Details window will appear. Here you can view the session history details for each event.
The matchmaking process can be started after the party leader invites another player to the party. The number of party members should match the configuration used when creating the matchmaking channel.
Use the following code to start a role-based matchmaking.
If a player has a role that’s not defined in the game mode of a role-based matchmaking, the party’s matchmaking request will immediately be rejected.
Once the matchmaking is complete, the matchmaking service will send a notification to the players to inform them that they've been matched. To implement this feature, use the function below.
The party leader can cancel matchmaking before a match is found. The players will also be notified that the matchmaking process is canceled. To implement this feature, refer to the function below.
After the matchmaking process is completed, every player in each party needs to confirm their readiness to start the game. To implement this feature, refer to the function below. You’ll need a match Id to run the Ready Consent function. The match Id will be received by the matchmaking notification after the start of matchmaking.
Once a player confirms they are ready to play, the other players in the party will receive a ready to play notification. The pass data of the user id who readies the match will be retrieved by the player with the notification.
If a player doesn’t confirm their readiness for play, the team that contains a non-confirming player will be banned from matchmaking for 30 seconds. The matchmaking process will be repeated from the beginning. The player will get a banned time value from the response when they successfully get matchmaking notification. This banned time cannot be set by default. To implement the restart matchmaking feature, use the function below.
The following function is used to start matchmaking for a joinable session.
When a server is claimed, it will query the session details from the Matchmaking service. The game server will determine whether the session is joinable or not by calling the following function.
When receiving a joinable session, the game server will enqueue the session to the Matchmaking service as soon as it is ready to accept more players. To enqueue a session, use the following function.
After the game server enqueues a session, players who are already matched into the session can connect to the Lobby.
To ensure that the session in the queue is accurate, any time a player leaves during the Lobby phase, the server will update the session in the queue. To make this update, use the function below.
When the game is about to start, the game server will dequeue the session to prevent the Matchmaking service from matching a new player into it. To dequeue a session, use the following function.
You can use sub-game modes to allow players to choose from multiple game modes within your game. The following function is used to matchmake a player into a sub-game mode.
Before using the Matchmaking service from the SDK, you will need to initialize your server-side SDK to make you authorized and able to perform create, read, update, and delete actions.
Before using the Matchmaking service from the Golang SDK, you will need to initialize the SDK by following the steps below:
Once you have completed the initialization, you can use the Golang SDK to create, read, update, or delete Matchmaking (opens new window) from your serverless app.
Before using the Matchmaking service from the Python SDK, you will need to initialize the SDK by following the steps below:
Once the fields are completed, you can use the Python SDK to create, read, update, or delete Matchmaking (opens new window) from your serverless app.
Before using the Matchmaking service, you will need to set some permissions. Use the following .NET namespaces:
using AccelByte.Sdk.Api.Matchmaking.Model;
using AccelByte.Sdk.Api.Matchmaking.Operation;
using AccelByte.Sdk.Api.Matchmaking.Wrapper;
Before using the Matchmaking service, you will need to set some permissions. Initialize the Matchmaking wrapper from the Matchmaking service using the following code:
Matchmaking wMatchmaking = new Matchmaking(sdk);
Once the fields are completed, you can use the SDK to create, read, update, or delete matchmaking.
Use the following function to add a player to the session in a channel (opens new window):
Use the following function to remove a player from the session in a channel (opens new window):
Use the following function to create a matchmaking channel (opens new window):
Use the following function to retrieve a matchmaking channel (opens new window):
Use the following function to update a matchmaking channel (opens new window):
Use the following function to delete a matchmaking channel (opens new window):
